Transferring a contact from one team to another takes just a few steps. However, due to the independence of Teams to customize their own setup, tags, custom fields and automations - there are limits to the data and assignments that can transfer with the contact.
It's important that you and the recipient of the contact(s) being transferred understand what is and is not part of the team transfer.
⚠️ Please read the following 5 sections before attempting a contact transfer! If you understand all benefits, limitations and cautions - click here to skip to the instructions below
1. What data from the Contact is transferred?
- Name, Email, Phone, etc.
- Notes
- Communication history
- Status (if the status doesn’t exist on the destination team, the status will be created and applied to the contact.)
2. What data from the Contact is NOT transferred?
- Tags
- Custom contact fields
- Linked contacts and their relationships (spouse, co-borrowers, realtors, etc.)
- Transactions (transfers are not allowed if the contact is associated with any transaction)
- Automations the contact is in or the position within those automations
3. Who can perform transfers?
- CRM Admins and Owners - These users have access to all teams.
- Team Leads - The user initiating the transfer must exist on both the source and destination teams.
4. Which scenarios prevent transfers?
- A contact with same email address and/or phone number exists on the destination team
- A contact has transactions on the source team (any transaction OR transaction on which they are a borrower/co-borrower)
5. What (could) happen after a transfer?
- After transferring a contact, if automation(s) exist with trigger conditions that match the newly transferred contact in the recipient team - those automation(s) will be assigned.
How to initiate a transfer of a Contact from one Team to another
☝️ Only 1 contact can be transferred at a time from one team to another
Before you begin, ensure you are in the correct team by checking the team name at the top-left.
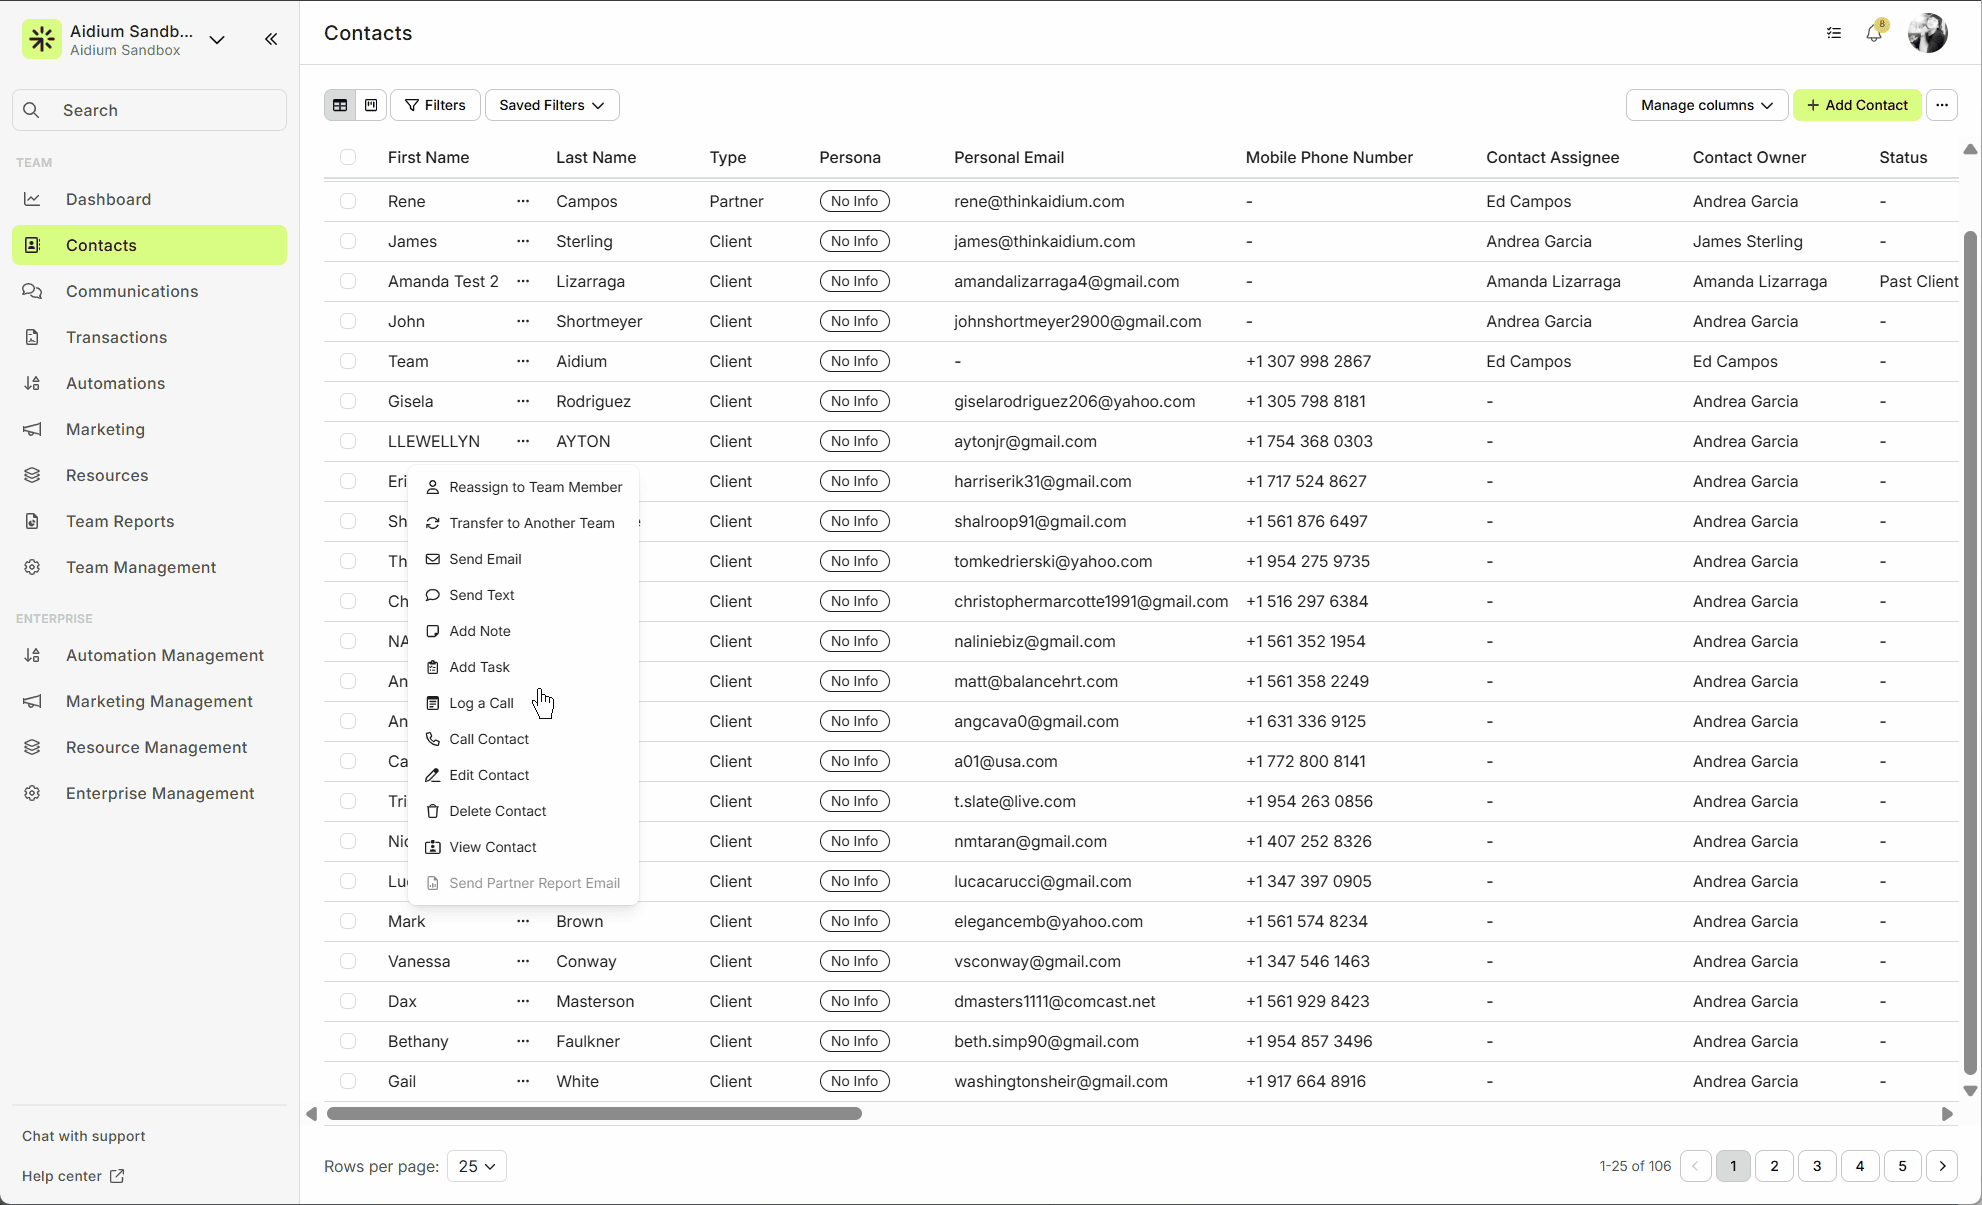
- To initiate a transfer, you must be in the Contacts section and in the 'List View'. It may be helpful to use the 'Filter' to narrow down the contacts to locate the contact(s) you want to transfer.
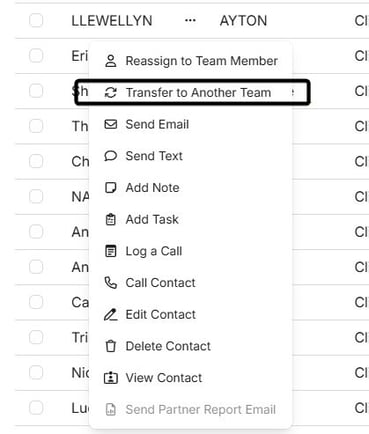
- Once you find the contact listed, click the ellipsis "..." next to the contact name. Then choose, 'Transfer to Another Team'.
- A slide-out will appear on the right. Be sure to do the following steps, using the below animated GIF as a reference.
- Verify you have chosen the correct contact to transfer.
- Choose the Team you want to transfer to.
- Choose the new Contact Assignee and Owner from the available team members.
- Check that you understand - It is important that you understand!
- When all are filled-out, click the 'Transfer' button, in yellow.
- Once you receive feedback of transfer completion at the top-right, the transfer process is completed.
👍 This concludes transferring a contact from on team to another