Transactions – Table View vs. Pipeline View
There are two easy-to-change views within Transactions. Table View, for a customizable list of contacts for a traditional spreadsheet style experience. While Pipeline View provides you with pre-sorted previews of each transaction based on Status.
Each view has its benefits and can be changed with a single toggle. We’ll cover how to switch views and explore the features of each. This is also available for Contacts here.
Change between Table View and Pipeline View
- In the Transactions section, you can switch between Table View and Pipeline View using the two icon buttons in the top-right corner—click the table icon for a spreadsheet-style view, or the graph icon to switch to Pipeline View' - it will be OFF by default. However, when you change the view, it will show the same view next time you go to your Transactions.

- Click the toggle to see the view change. The first time you change to Pipeline View, it may take a few seconds to load.

🌟 The last view you chose will be the view that loads next time.
👍 This concludes changing the view from table to pipeline.
Anatomy of Table View
Table View should feel very familiar, as it is much like a spreadsheet. It will show you all transactions based on the current Filter (all, by default) and the Columns you currently have visible. This view can scroll right to left to view more Columns - and - top to bottom to view more Transactions.
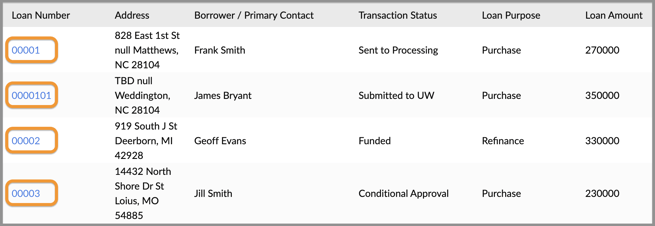
In the below image - there are 4 sections of the Table View that we will discuss.
- Columns - These directly correspond to the data fields filled out in each Transaction. These are all the fields designated as visible in this view. You can change the columns using the 'Manage columns' button. Here is an article on that. You can also sort the table (ascending or descending) by clicking the Sort icon to the left of each column as demonstrated in the animated GIF below.

- Open a Transaction - If you wish to open a Transaction, simply look for Blue (links). Look for the 'LOS ID' column.

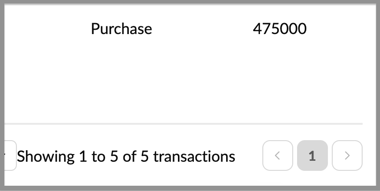
- Number of Visible Transactions per Page - You can choose the number of contacts you would like visible on each page. Click the drop-down in the lower-left of the Transactions section and choose how many you would like visible on each page (25, 50 or 100).

- Advance Page and View Total Transaction Count - When there are more Transactions than can fit on a single page, you can click to go to the next page of Transactions. To do so, look for "Showing..." at the lower-right in the Transaction Section. Simply click on the < or > buttons, or choose the page # you would like to advance to. Within that section, you will also see the total Transaction Count that matches the filter you either have set or not set.

Anatomy of Pipeline View
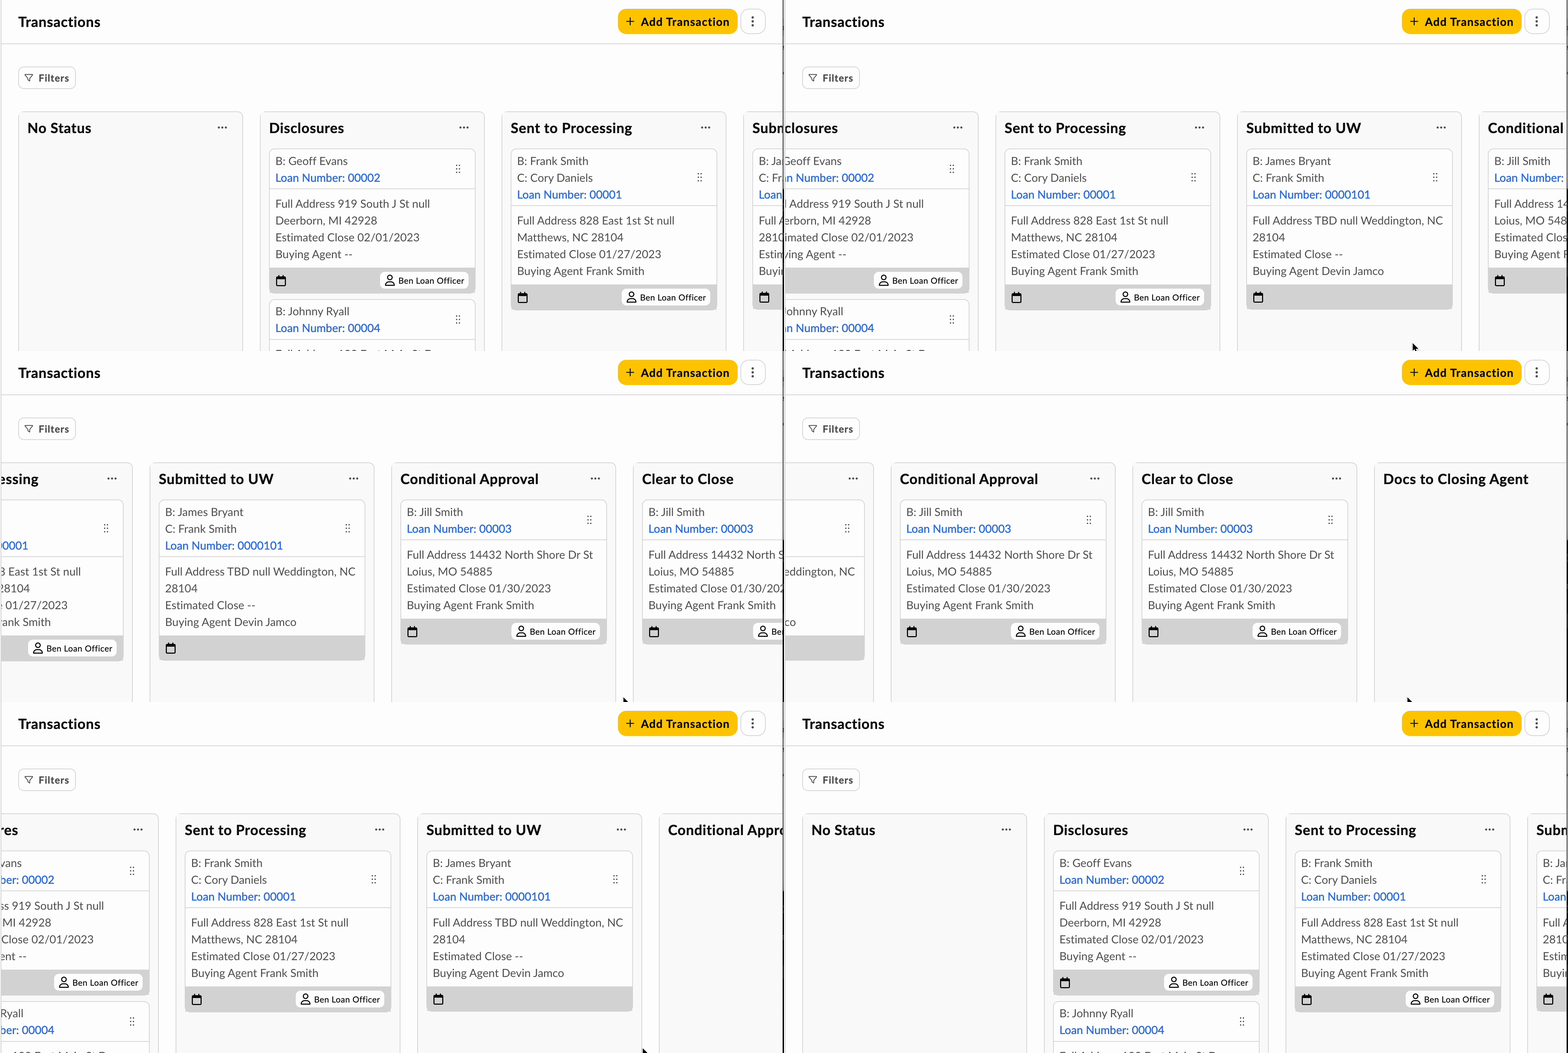
The Pipeline View provides the same ability to Filter your contacts, however, the view is significantly different. First you will see your Contacts grouped together by Status. In each Status group, you will see a consolidated preview of important contact details - name, email, phone, referred by, last contacted and owner.
To view more Status Groups, scroll from left to right. To view more Contacts in each Status group, hover your pointer over the group and scroll down.

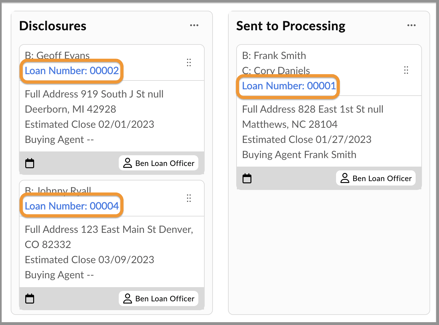
- Groups to Display Transactions Based on Status - In each Transaction Status will be displayed from Left to Right, with 'No Status' always being at the far left. You can adjust the order of Transaction Groups in Settings.

- Link to Open a Transaction - At any time, you can click the name of the Transaction, in blue, to open the Transaction. This will change the current display to the full Transaction View.

- Sort the Transactions within a Status Group - Click the ellipse at the top-right of a Transaction Status group to see your sorting options. You can sort by last date contacted or last name. Additionally, you can create a new quick transaction with a matching status of the group from which it was created.

- Drag a Contact to Quickly Change the Status - From the Transaction Pipeline view, you can easily change the status by clicking at the top-right corner of any Transaction preview box, then drag it to the appropriate new status. Using this method, you can quickly update the status of a Transaction and trigger associated automatons or IPW (In-Process Workflow), as we will show in the animated GIF below.

⚠️ Manually adjusting the transaction status will most likely trigger an automation. You will receive a warning message and have the opportunity to stop it by choosing 'No'. In most cases, transaction automatons will trigger emails, tasks and/or sms'.