Key Benefits of the SimpleNexus Integration:
-
No need to manually add loan applicants or wait for your LOS to push them into Lendware.
-
Automatically re-engage applicants who stop midway through an application, with little effort from your team.
-
Trigger automations based on the applicant’s situation.
-
Never forget about an application — no human follow-up needed to communicate with or thank an applicant.
⚠️ Before users can do the following steps, your Enterprise must have completed their initial API connection from SimpleNexus to Lendware. If you do not know, please contact your Company's Lendware administrator and include this link to the administrative setup instructions.
SimpleNexus Integration sections:
Individual User setup
Each user in Lendware that has a SimpleNexus account must be setup one at a time in their Team Settings. It's an incredibly quick and straightforward process that can be completed in very few steps.
- Log in to Lendware. If you are an admin or have access to multiple teams, be sure to enter the appropriate Team before continuing to the following steps.
- In the menu group on the left, choose 'Team Management', then 'Integrations'.
- Next, the Team Integrations page will load. We will concentrate on the SimpleNexus Integration section. If you do not see that section, please contact your company's Lendware admin, as the initial SimpleNexus integration may not have been requested.
- From the SimpleNexus Integration section, click the 'Team Member' drop-down and choose the appropriate user. Next to that, 'SimpleNexus Email' is where you will enter the User's SimpleNexus login email in all lowercase. There is no need for a password to complete the setup.

Once complete, click the 'Add Member' button, in yellow.
- If you are adding a single user, the process is complete.
If you wanted to add additional users in that team, simply repeat Step 4 above until all users have been integrated. All users that are integrated will continue to be listed, as long as the integration is not disconnected for a user.
To remove a user from the SimpleNexus integration, you can click the 'trash' icon next to their name in the SimpleNexus Integration section.
- Additionally, if there are users in other teams, just switch the visible team using the drop-down at the upper-left of the screen.
⚠️ Be sure to use all lowercase when entering a SimpleNexus Email address before clicking the 'Add Member' button.
⚠️ It is ideal that after you integrate a User, you also test the integration using the steps in the final section of this article.
👍 This concludes individual User setup for the SimpleNexus integration
When a Contact is Pushed to Lendware
A contact is pushed to Lendware for two different reasons and each with different timings.
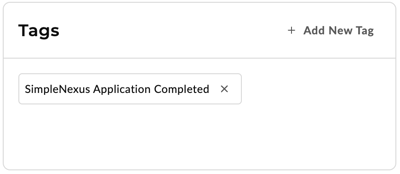
- When a client completes and submits an app in SimpleNexus, it will quickly pass the contact to User account linked in Team Settings to the SimpleNexus account specified (in the steps below). Lendware will create a new contact and assign it to the appropriate user - it will then add a Contact Tag: "SimpleNexus Application Completed"
- When a client creates and account in SimpleNexus, but does not complete the app, it will wait about 2 hours and then push the contact. Lendware will create a new contact and assign it to the appropriate user - it will also add a Contact Tag: "SimpleNexus Application Abandoned"

Not only will this help the user identify how the contact arrived in Lendware, but also what action (or inaction) took place.
In the following section, we will use this information to automatically assign an automation for appropriate follow-up by using an automation for each situation.
🎉 If a Contact already exists in the team with the same contact information (First & Last name, email and phone), it will automatically link and update the existing contact.
👍 This concludes understanding when a contact is pushed from SimpleNexus to Lendware
How to trigger an automation
The ideal way to manage new contacts from SimpleNexus is by building an automation, triggered by the tag automatically added.
- SimpleNexus Application Completed
- SimpleNexus Application Abandoned
⚙️ If you have not built an automation, or would like a refresher, click here
To begin, go to the Automations page in Lendware. Then, click 'Create Automation' button at the top-right. Provide a name that will be easily understood, like: "SN - Application Completed". It will also be helpful to create a description of the automation, this will help you or anyone else understand what this automation does and how it is triggered.
Once completed, the automation preview should look something like this:
Application Completed
- Create a new automation, then provide a name and description. Next, choose, "Contact-based automation". Click, 'Continue' button.
- Next, we will add the Trigger condition for, 'SimpleNexus Application Completed' tag.

- Once your trigger condition(s) are set. You will then add the 'Actions' appropriate. For now, we will create a basic email.

- When satisfied with your automation, click 'Save Changes' and then enable the automation by clicking, "On" toggle at the top-right.
Now, any contact existing or created, with the tag: "SimpleNexus Application Completed" will trigger this automation and assign Actions added.
Application Abandoned
- Follow the above steps 1-3 to create your automation, set the trigger conditions and add Actions.
Be sure to use the tag: "SimpleNexus Application Abandoned" in the trigger conditions.
- When creating this automation, you may want additional emails and/or SMS notifications with delays. This will help entice the applicant to either complete the application, or let the applicant know you're there to help with any questions or struggles while filling out the app.

- If adding additional actions, it is important to create Exit Conditions - this will STOP the automation when the applicant returns to the application and completes it.
👍 This concludes building a basic automation for each, Application Completed and Application Abandoned