How to Build a Newsletter Automation
A Newsletter Automation is a one-time, contact-based automation designed to send a single communication or campaign to a group of contacts on a scheduled date and time.
Think of it like sending a Real Estate Agent Newsletter to all contacts tagged Realtor Newsletter. Unlike a Workflow (which is ongoing and can have multiple steps), a Newsletter Automation Campaign is simple, one-and-done: it sends a single scheduled communication and then completes.
By starting with the Delay by Date action, you can load all eligible contacts into the automation and hold them until the exact moment you want your email to go out.
What We’ll Cover
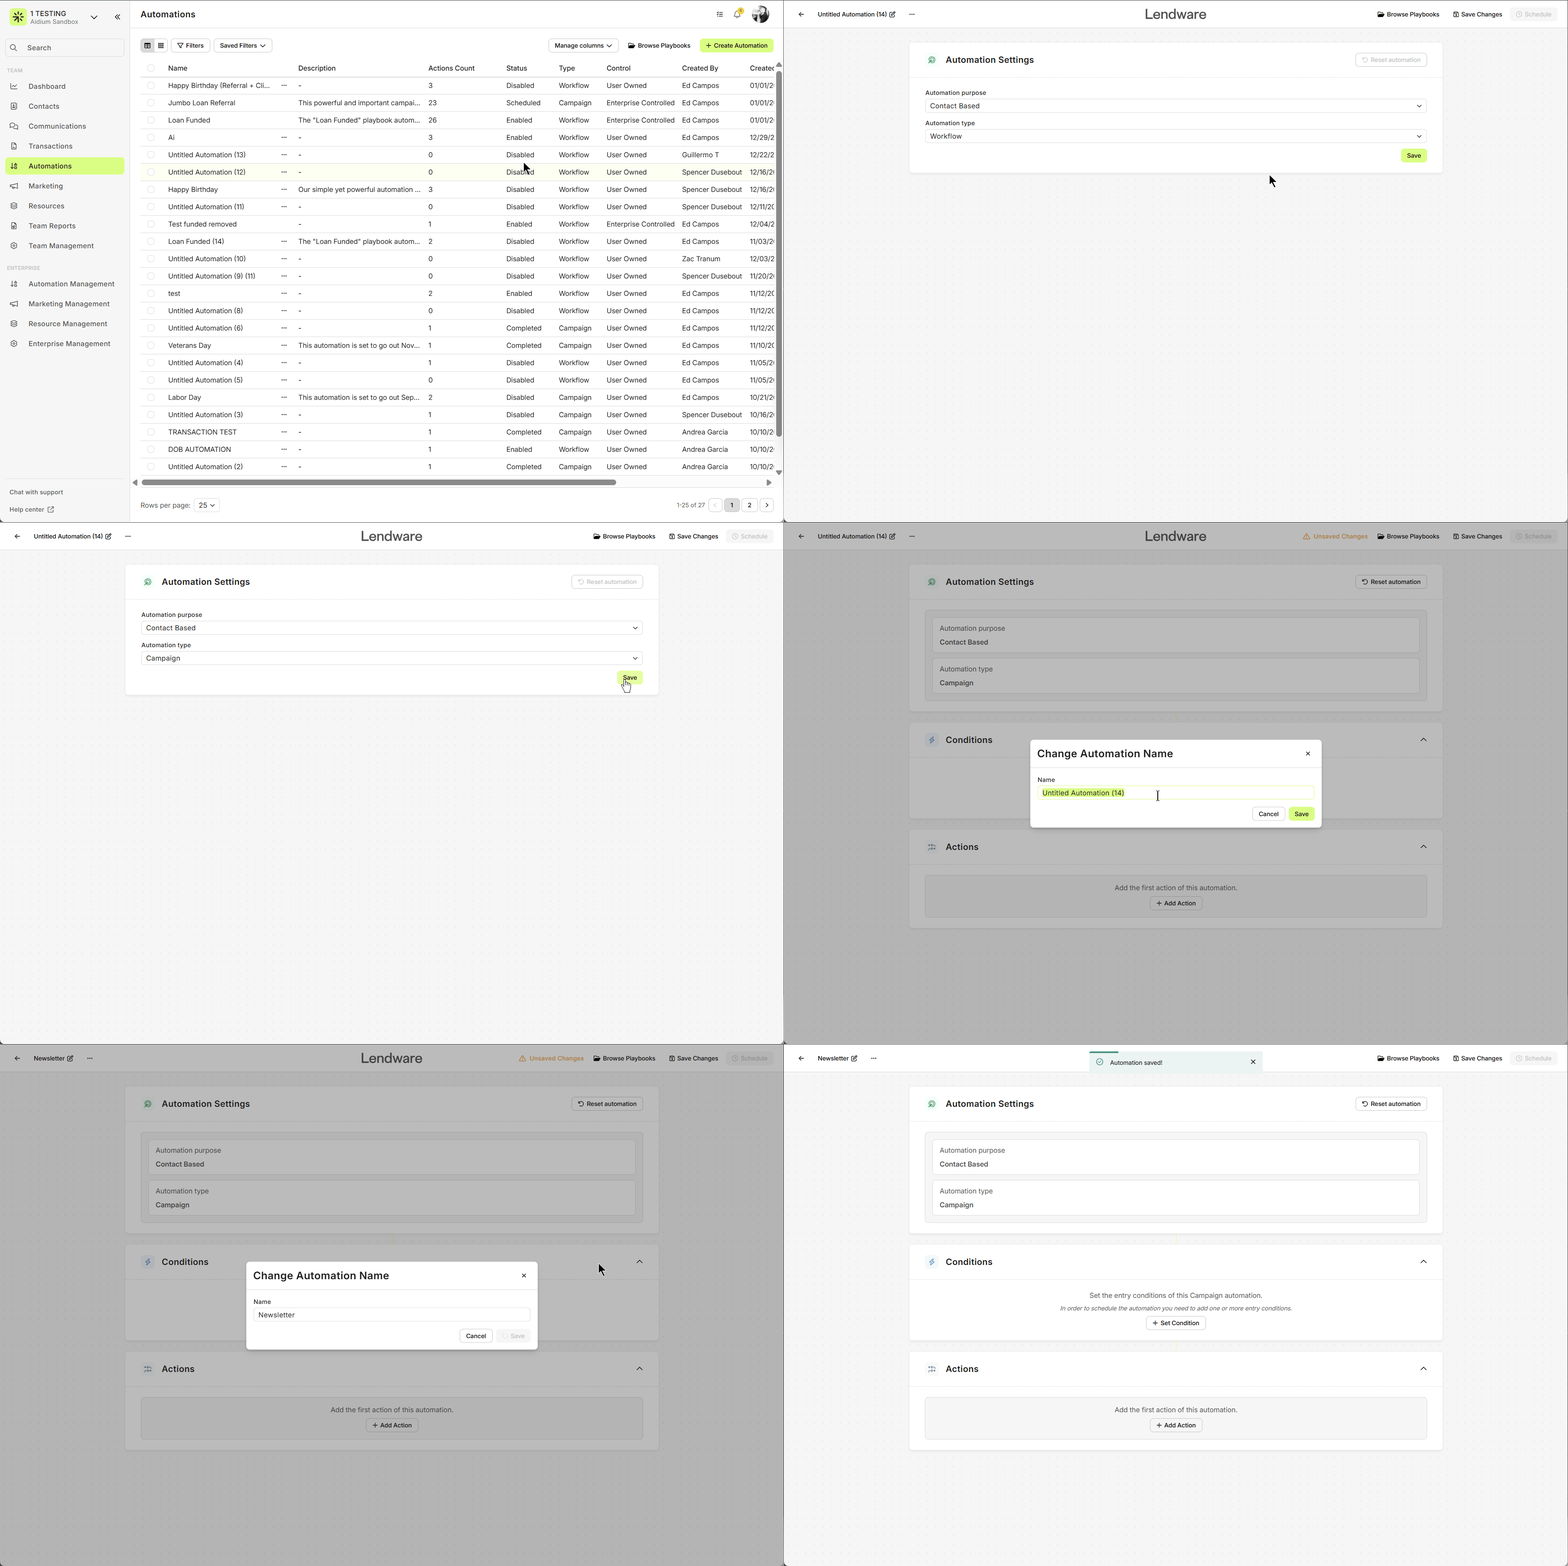
Create a New Automation
-
Click Automations in the left-hand menu.
-
Select + Create Automation in the top-right corner.
-
Choose Contact-based automation + Campaign and click Continue.
Next, give your automation a clear name and description so your team knows what it’s for later.
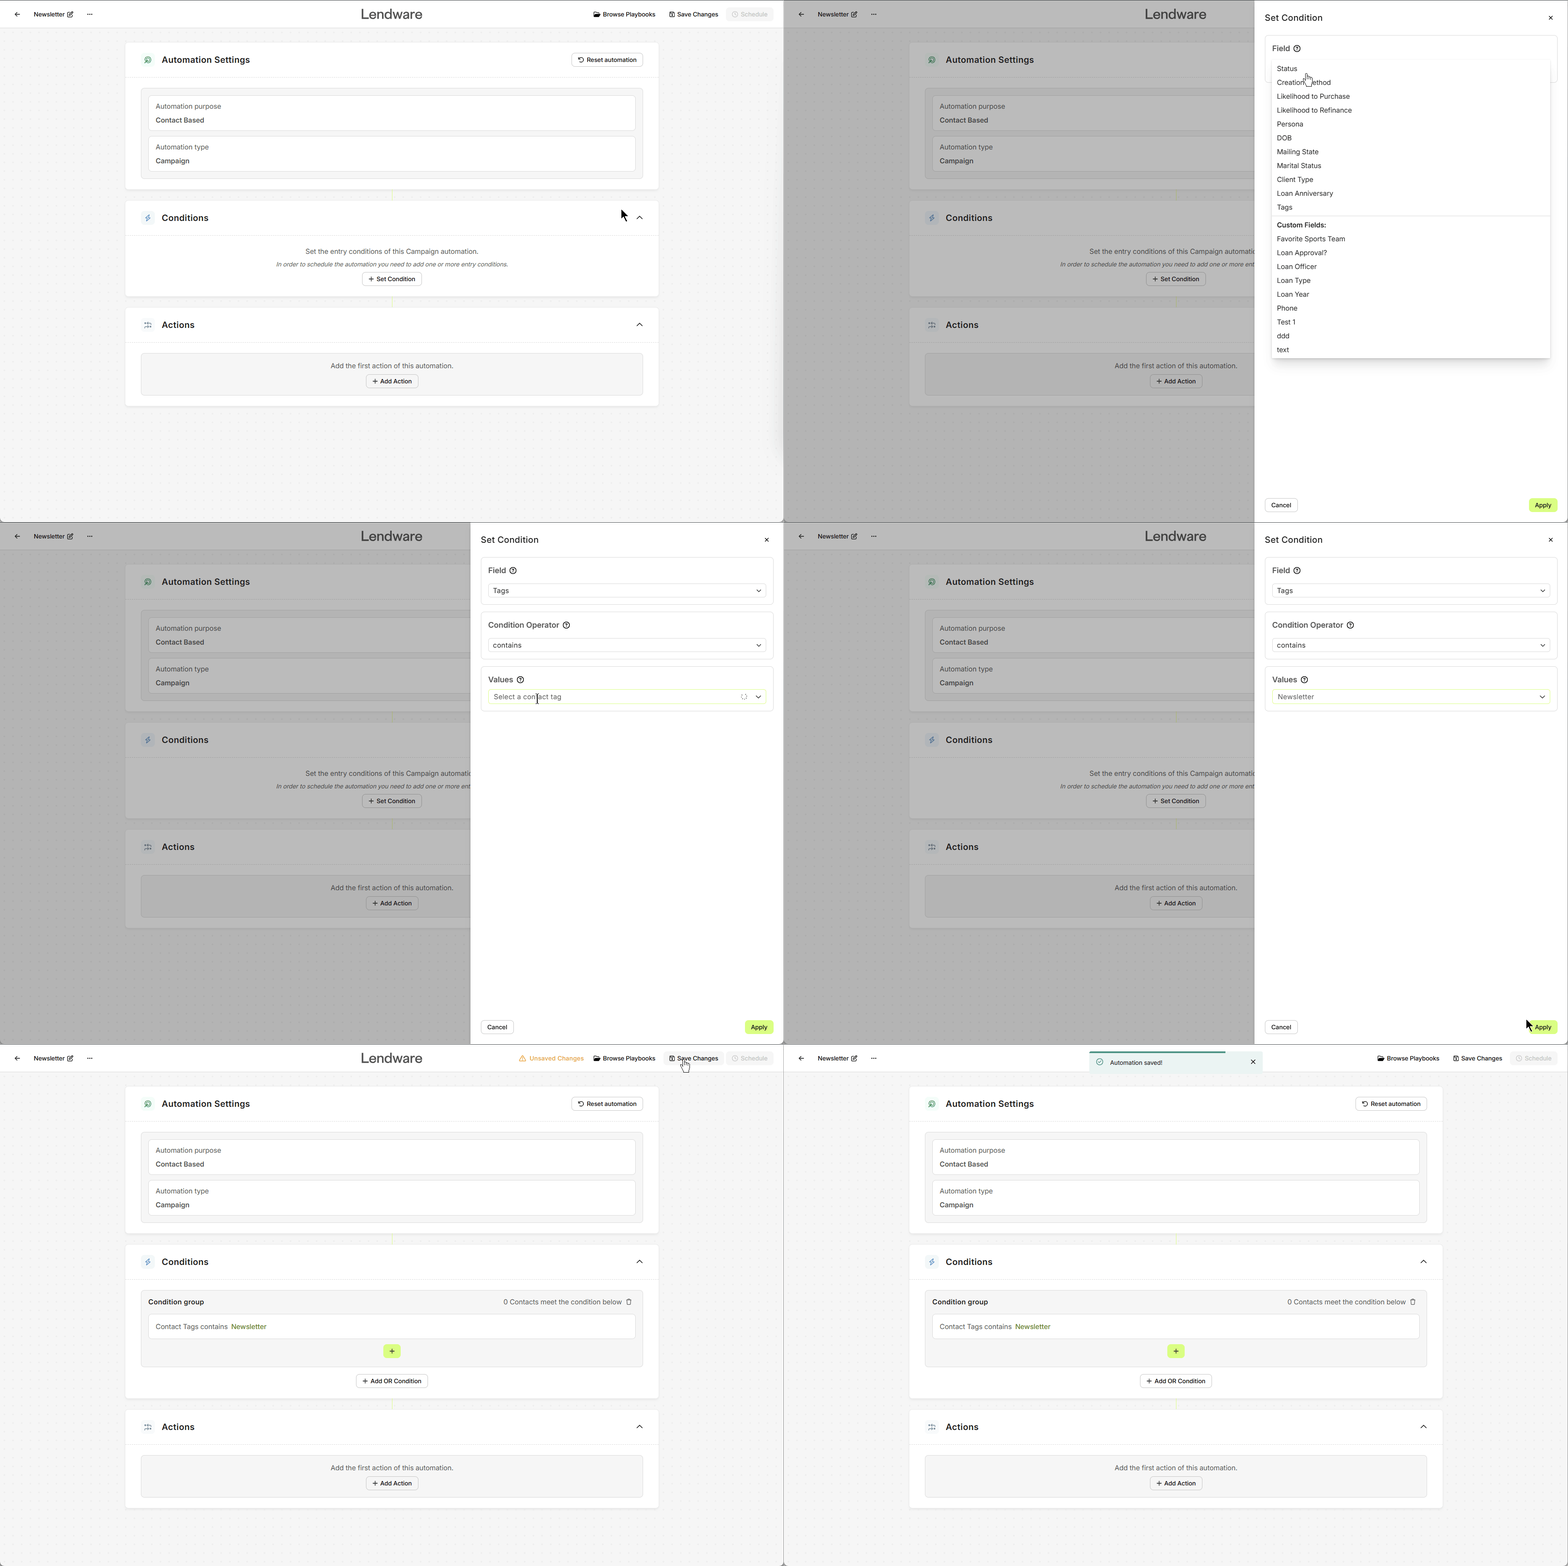
Entry Conditions
Entry conditions control who gets added to the automation.
For a newsletter, you’ll usually use Contact Tags, Contact Type, or Contact Status.
Example: Targeting all contacts with the tag Realtor Newsletter.
- Click + Set Condition.
- Choose Tags from the dropdown.
- Select Contains, then pick Realtor Newsletter.
- Click Apply.

At this point, you’ll see a preview of how many contacts match. For example: 3 contacts match this condition.
Don’t forget: since this is a campaign-style automation, all currently matching contacts will be added as soon as you activate it
Actions
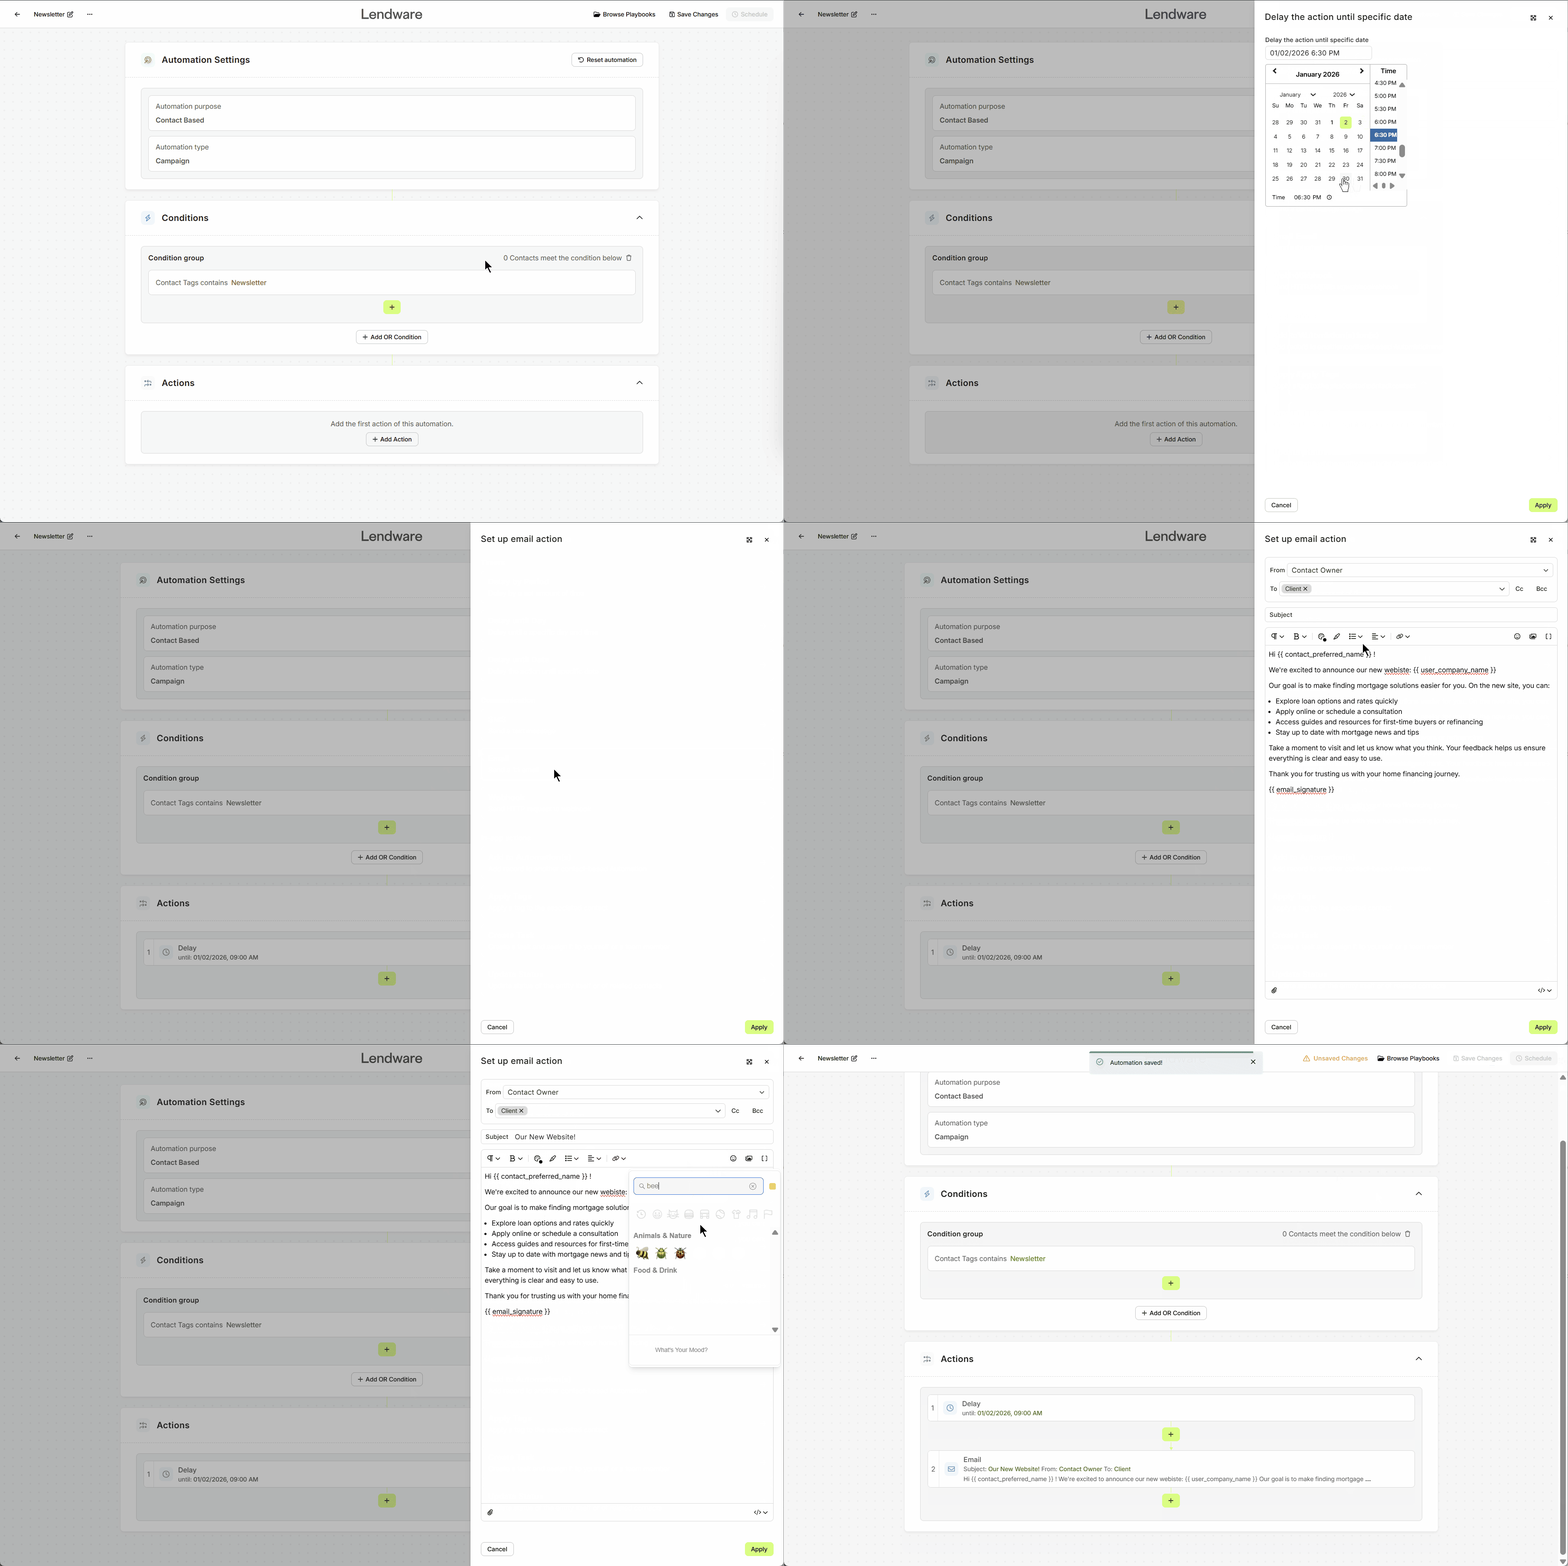
For a newsletter, you’ll typically only need two actions:
-
Delay by Date
-
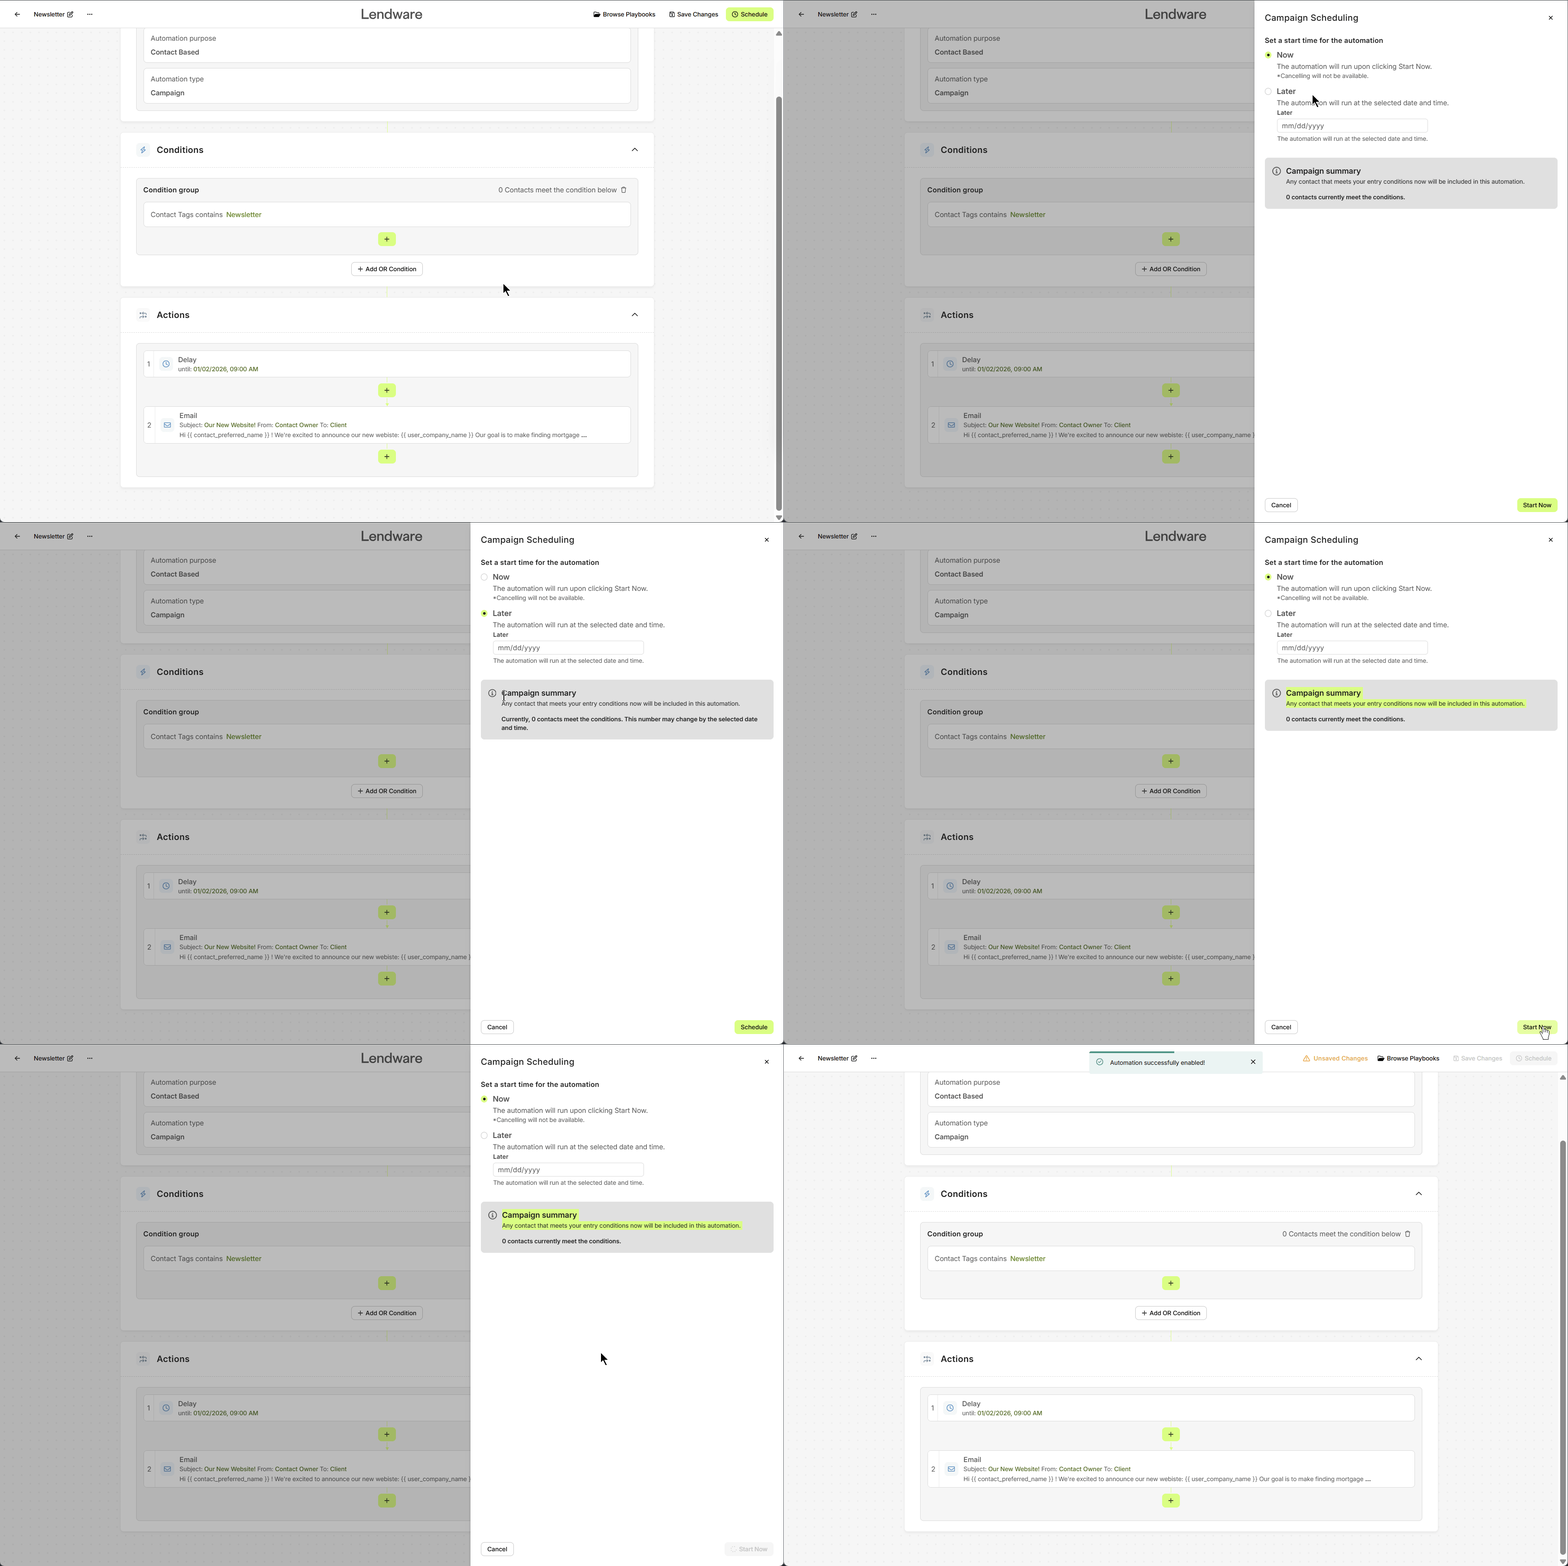
Schedule your automation to start at the exact date and time you want your newsletter to be sent. You can also select a schedule when enabling your automation. To learn more, check out Campaign vs Workflow.
-
-
Send Email
-
Create or select the email you want to send.
-
You can personalize the content with merge fields to make it more engaging.
-

That’s it! Keep newsletters simple: delay until the scheduled time, then send the email.
Once the automation runs, its status changes to Complete.
Automation Behavior + Schedule
-
The automation immediately enrolls all eligible contacts.
-
Future contacts that match the conditions will also be enrolled.
-
However, if they join after the scheduled delay date has passed, they will not receive the newsletter.

Important:
Once this automation has been scheduled, any edits or modifications will require you to set the schedule again.
Need more help? Check out: Contact Based Automations