- Create Task from within a Contact's Detail Screen
- Create Task from the Task View
- Create Task from Universal Search
Create Task from within a Contact's Detail Screen
This is the most efficient and simple way to create a task. First, when creating a task, most likely, you'll already be in the Contact Detail anyway. Additionally, when creating, it will automatically link it to the contact. This will save time and reduce the chances for human error.
- To begin, we'll find and open the contact we want to assign a task to. To learn more about quickly finding a contact, click here.
Once viewing the Contact Detail page, we'll click the 'More Actions' [...] button at the top-right. Then, click on the 'Add Task' button.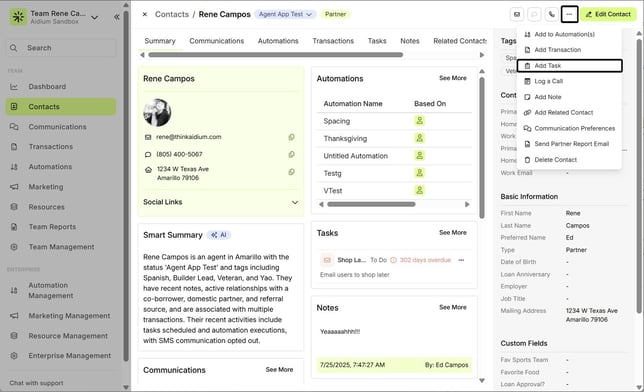
- Next, the 'Add Task' drawer will slide-out on the right of the screen.
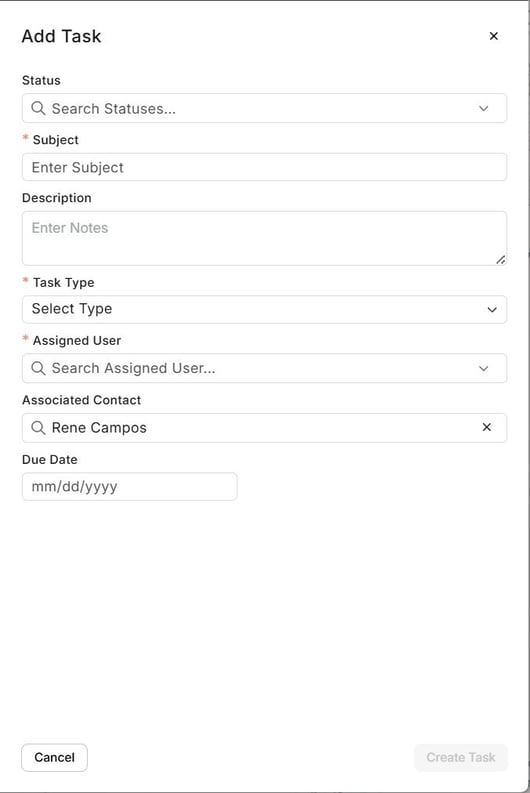
- When adding a task, it will default to a 'Status' of 'To Do' - This can be changed, however most likely, you will want it to remain.
Fill Out the Task Form:
Field Required? Description Team ✅ Yes Usually defaults to your assigned team. Status ❌ No Options: No Status, To Do, In Progress, On Hold, Done Subject ✅ Yes A short, descriptive title for the task. Example: “Call to verify documents” Task Type ✅ Yes Select: Call, Email, Text, Other Assigned User ✅ Yes Assign the task to yourself or another team member. Associated Contact ❌ Optional Automatically filled if you’re creating the task from within a contact. Due Date ❌ Optional Helpful for time-sensitive follow-ups and dashboard visibility. Description ❌ Optional Add notes, details, or instructions related to the task. - We will perform the above list of Task details in the animated GIF below.
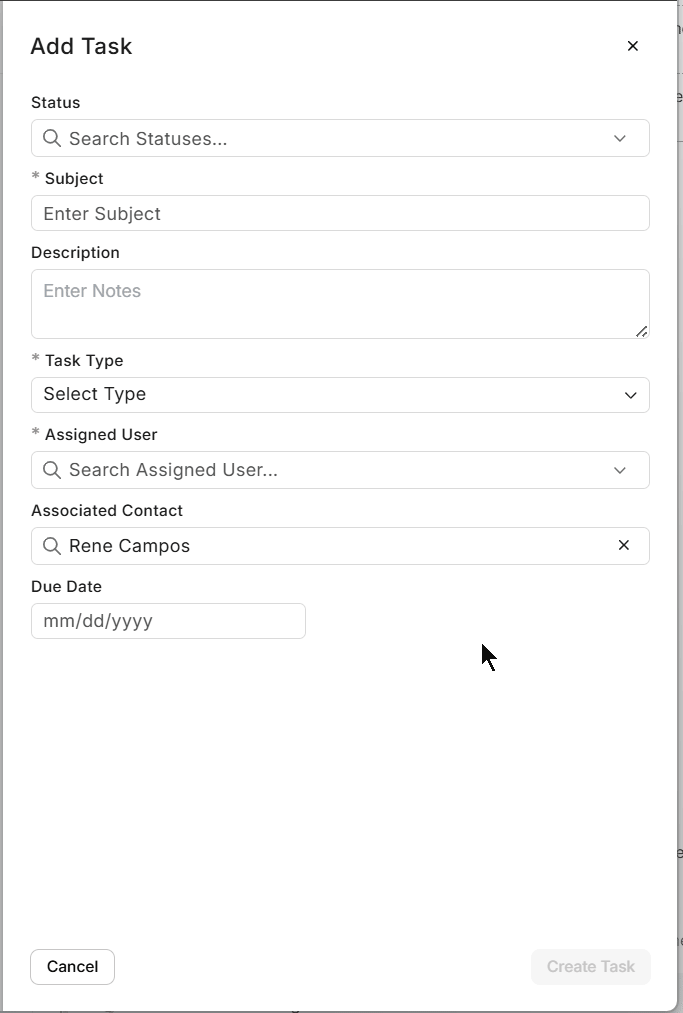
- When you have added all required and optional details for the task, click the yellow 'Create Task' button.
To learn more about creating, viewing and managing tasks from a Contact, click here.
👍 This concludes adding a new task from contact's detail view
Create Task from the Task View
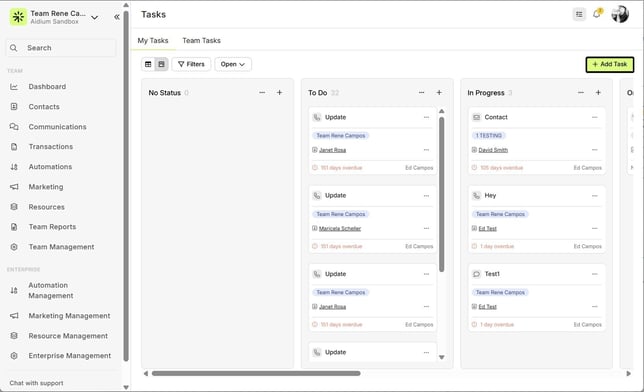
The Task View provides a list of all tasks - due today, in the future or in the past. Additionally, you can view tasks that are Done, In Progress or To Do, as well as tasks assigned just to you, or also, to your team. To learn more about the Task View, here is an article.
- To begin, click the '+ Add Task' button at the upper-right, in yellow.
- Next, the 'Add Task' drawer will slide-out on the right of the screen.
Next, follow the list of fields, what they are used for and finally, their potential requirements.
Field Required? Description Team ✅ Yes Usually defaults to your assigned team. Status ❌ No They can be any of the default options (No Status, To Do, In Progress or Done) or others depending on how they’re set in Enterprise.
Subject ✅ Yes A short, descriptive title for the task. Example: “Call to verify documents” Task Type ✅ Yes Select: Call, Email, Text, Other Assigned User ✅ Yes Assign the task to yourself or another team member. Associated Contact ❌ Optional Automatically filled if you’re creating the task from within a contact. Due Date ❌ Optional Helpful for time-sensitive follow-ups and dashboard visibility. Description ❌ Optional Add notes, details, or instructions related to the t - When you have added all required and optional details for the task, click the green 'Create Task' button.
👍 This concludes adding a new task from the task screen
Create Task from Universal Search
Adding a quick task linked to a contact has never been easier than using the Universal Search function. This will allow adding a task without having to link the contact or even entering the contact detail.
On the upper-left, look for the Universal Search box. Click there and begin typing the contact name, email or phone. Once you see the contact listed, click the 'ellipsis' (drop-down) and choose 'Add Task'. As seen in the animated GIF below.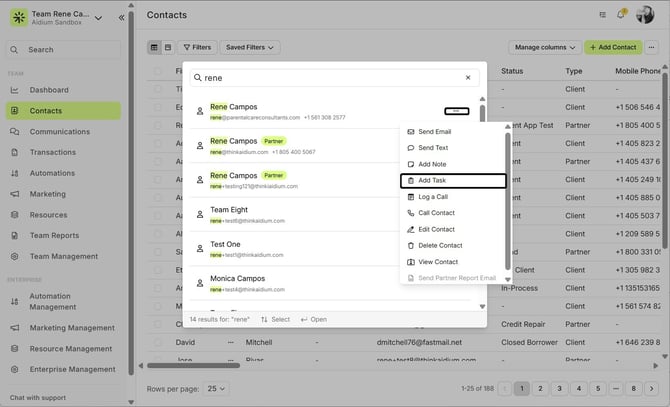
Next, just follow along as in the previous steps for adding the task details.
👍 This concludes adding a new task from the universal search.