- Get to your email signature in User Settings
- Add an Image Only signature
- Add an HTML signature from a signature generator or from your marketing dept
- Create a basic signature from scratch inside of Lendware
- Find the right web-app to create your own custom HTML signature
- Send a test email to view your new signature
In each case, it doesn't take long and with the right resources, it will look great and help keep you compliant in every outbound email from Lendware.
There are many important aspects of a great email signature:
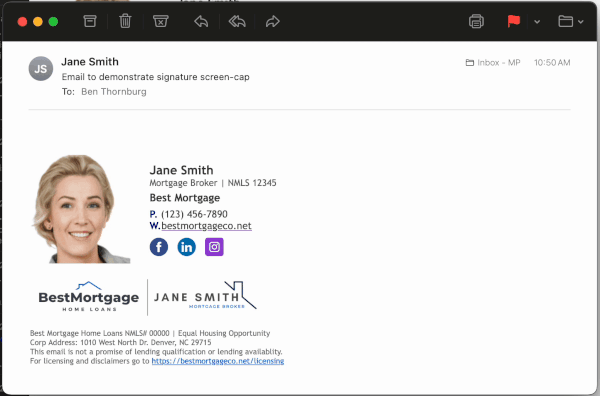
- Head-shot - Put a face to the name. Be you, be professional and be friendly. With the photographic technology built into a modern smartphone and you want an up-to-date head-shot, just grab a friend or colleague and get into some natural light for a quick photo shoot.
- Be legal and compliant. If you're licensed, include your NMLS ID. Add your company's legal disclaimer for email; usually at the bottom of your email signature. If required, add your legal physical address and licensed-in states.
- Keep your phone number(s) basic and clearly marked. If you use a unified communication service, like RingCentral or DialPad, this may be the only number you need. But you might want to leave off that fax number.
- Include your company logo and team logo. Brand consistency is important!
- Finally, link out to your website and social media. Give folks a way to connect outside of responding to your email. They won't forget about you if they are connected on your social media platforms.
- Keep it simple and clean. Awards are great, but maybe keep those to on your website and/or social media. Email signatures are for important, compliant and actionable information, not a trophy wall.
Get to your email signature in User Settings
To begin, we will go out the email signature section in our User Settings.
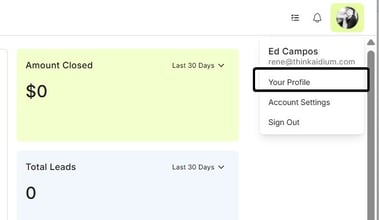
- After logging in and going to our Enterprise, click on the logged-in user name at the top-right, then choose, 'Account settings'.
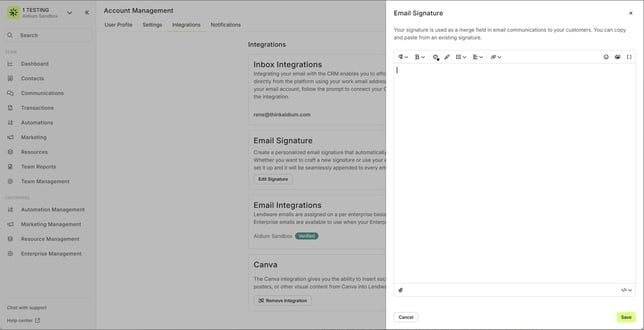
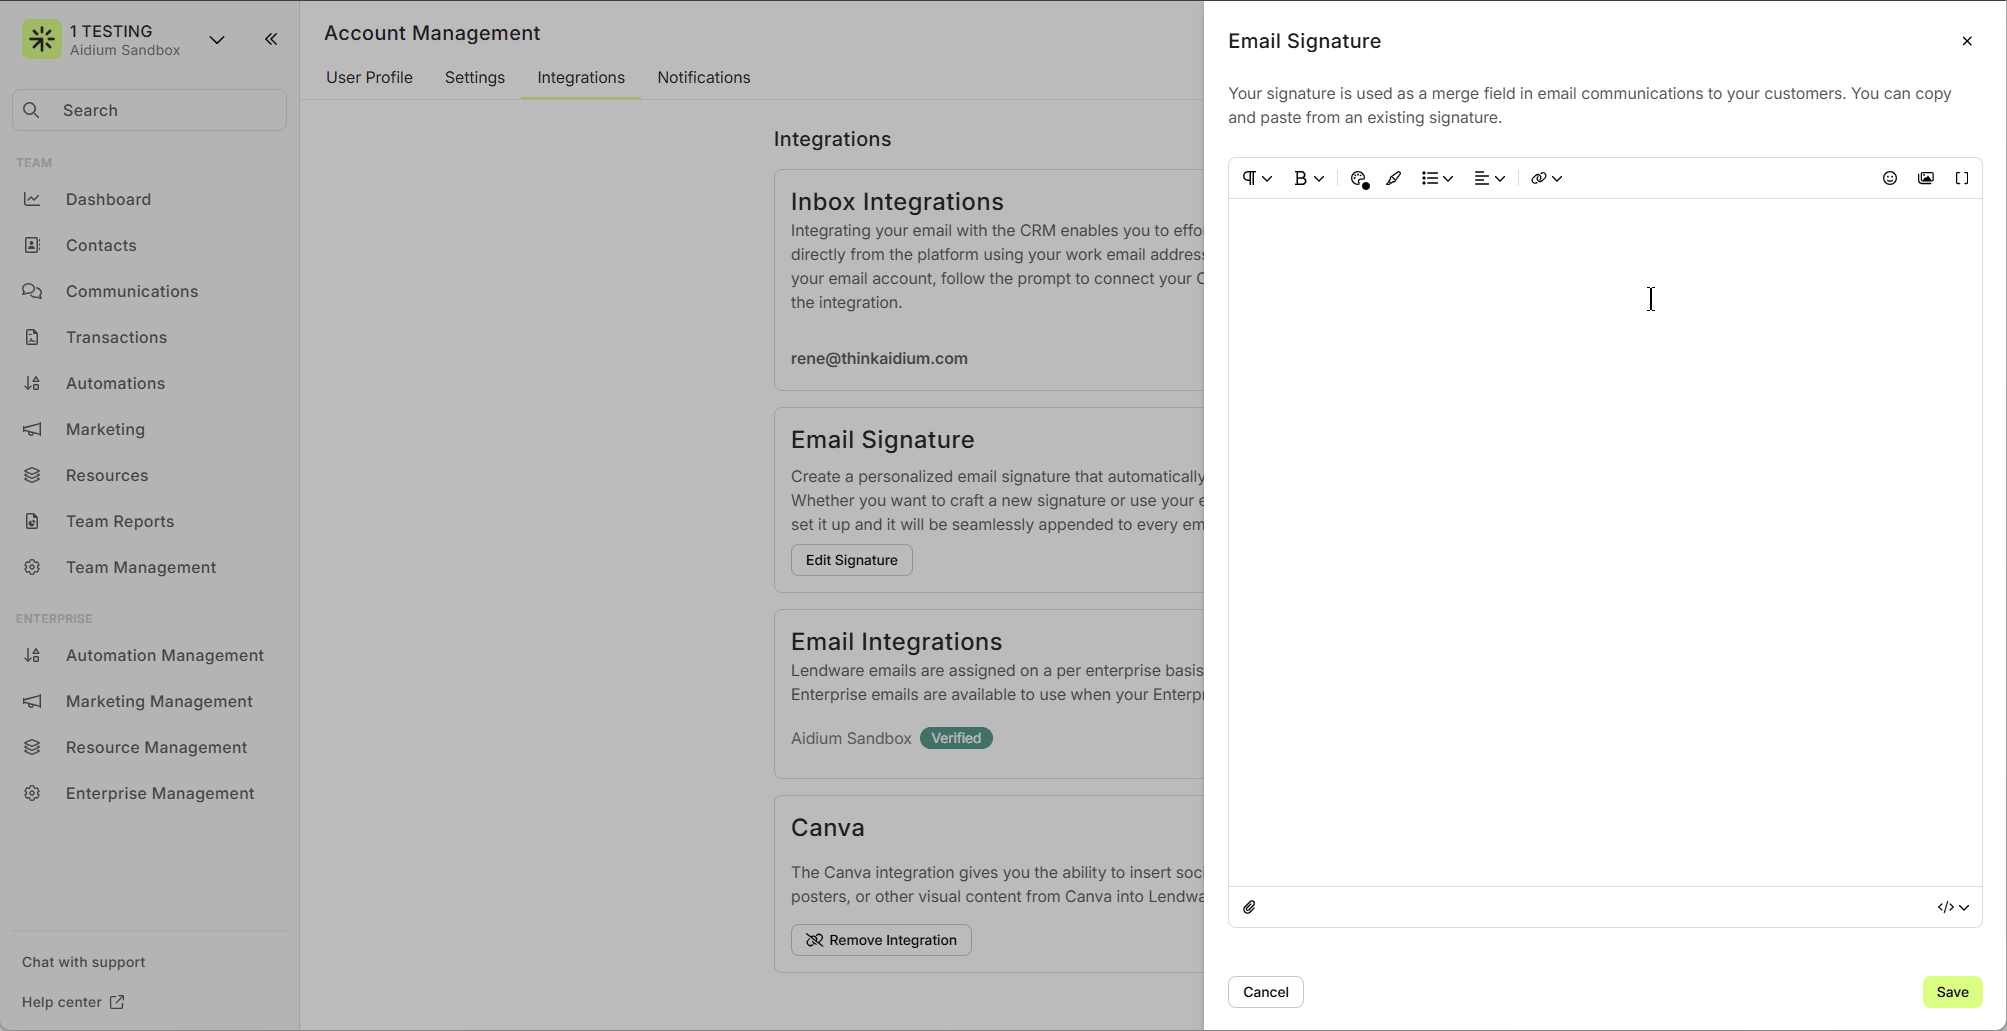
- On the User Settings page, we'll chick 'Integrations' on the left. Then we'll click the 'Edit Signature' button in the Email Signature section.

- Next, a drawer slides-out. This is where we will add out new email signature. Since this is our first time, there isn't an existing signature and it appears completely blank. This should look and feel like the email editor with much of the same functionality.
- Next, we'll concentrate on obtaining the signature in each subsequent section of this article. At which point, we'll add them using their respective methods.
Add an Image Only Signature
Using an image only signature is a quick and easy way to get started and requires little technical prowess to accomplish.
To begin, we can simply take a screen-capture of our current email signature in Outlook, gmail, or other email client.
In Windows, use the 'Snipping Tool'. On a Mac, we can simultaneously press, CMD+Shift+4 to draw a box around our email signature. After we capture our signature image, we'll confirm it's location so we can add it to our User Integration settings.
- We'll first use our preferred tool for obtaining a screen-capture of our current email signature. In the animated GIF below, we opened an email we sent to ourselves that has our current email signature.
- Once we've captured the image, it's check the image dimensions. The ideal maximum width is about 500-560 pixels. If our image is more than 500-560 pixels wide, we'll downsize the image to be only about 500 pixels wide.
- After using the steps in the above section to open the email signature editor, we will add the image we just created to the signature editor. Before we do, we'll add a 'space' then press, 'return'. This is important to both give a buffer, as well as add required input. If we do not add this buffer, the image may not commit to the our new signature.
- We are now finished adding our image only email signature. It will automatically be added whenever the email signature merge field is present in an email (which is always added when by default when creating a new email).
Learn how to send a test email to preview the final email signature, click here.
Add an HTML signature from signature generator or marketing dept
Why use HTML? Long story short, it's a great way to get a compelling and consistent email signature with images that are not attachments. A great signature will actually help increase your email delivery rates, reduces the potential for junk and can help keep you compliant and legal.
⚠️ It's ideal to limit the width of HTML signature to no more than 540 pixels wide
Our marketing department should be able to provide us with an HTML email signature. Once we have an HTML file, do the following:
- Open the file in a text editor or HTML editor.
- On PC, open with 'Note Pad', select ALL, then copy.
- On Mac, open with 'Text Edit', select ALL, then copy.
- After using the steps in the above section, we will click the HTML button to enter the HTML edit mode. It will always ask to confirm when changing from Text edit mode to HTML edit mode - and vice versa. This is to protect any work we may have already done from unintentional changes.
At any point, we can click the 'Show preview' button to render the HTML to view the actual signature. To switch back, we simply click the same button, but now labeled, 'Show code editor'.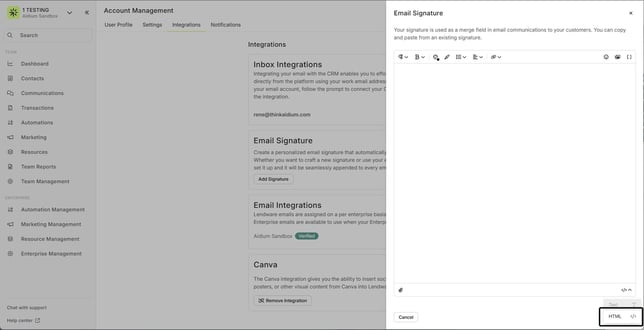
- To add our new custom email signature, we'll open our HTML document in the text editor, select all and copy.
Next, we'll click inside the Lendware HTML editor, and select any pre-populated HTML. Then, paste all of the HTML from the text editor into the code editor.
At this point, we can click the 'Show preview' button, to view the rendered HTML. When we're satisfied with the results, we'll click the 'Save' button at the bottom-right.
Do NOT adjust the editor back to 'Text', as this may make undesirable updates to the new signature. Just click 'Save'.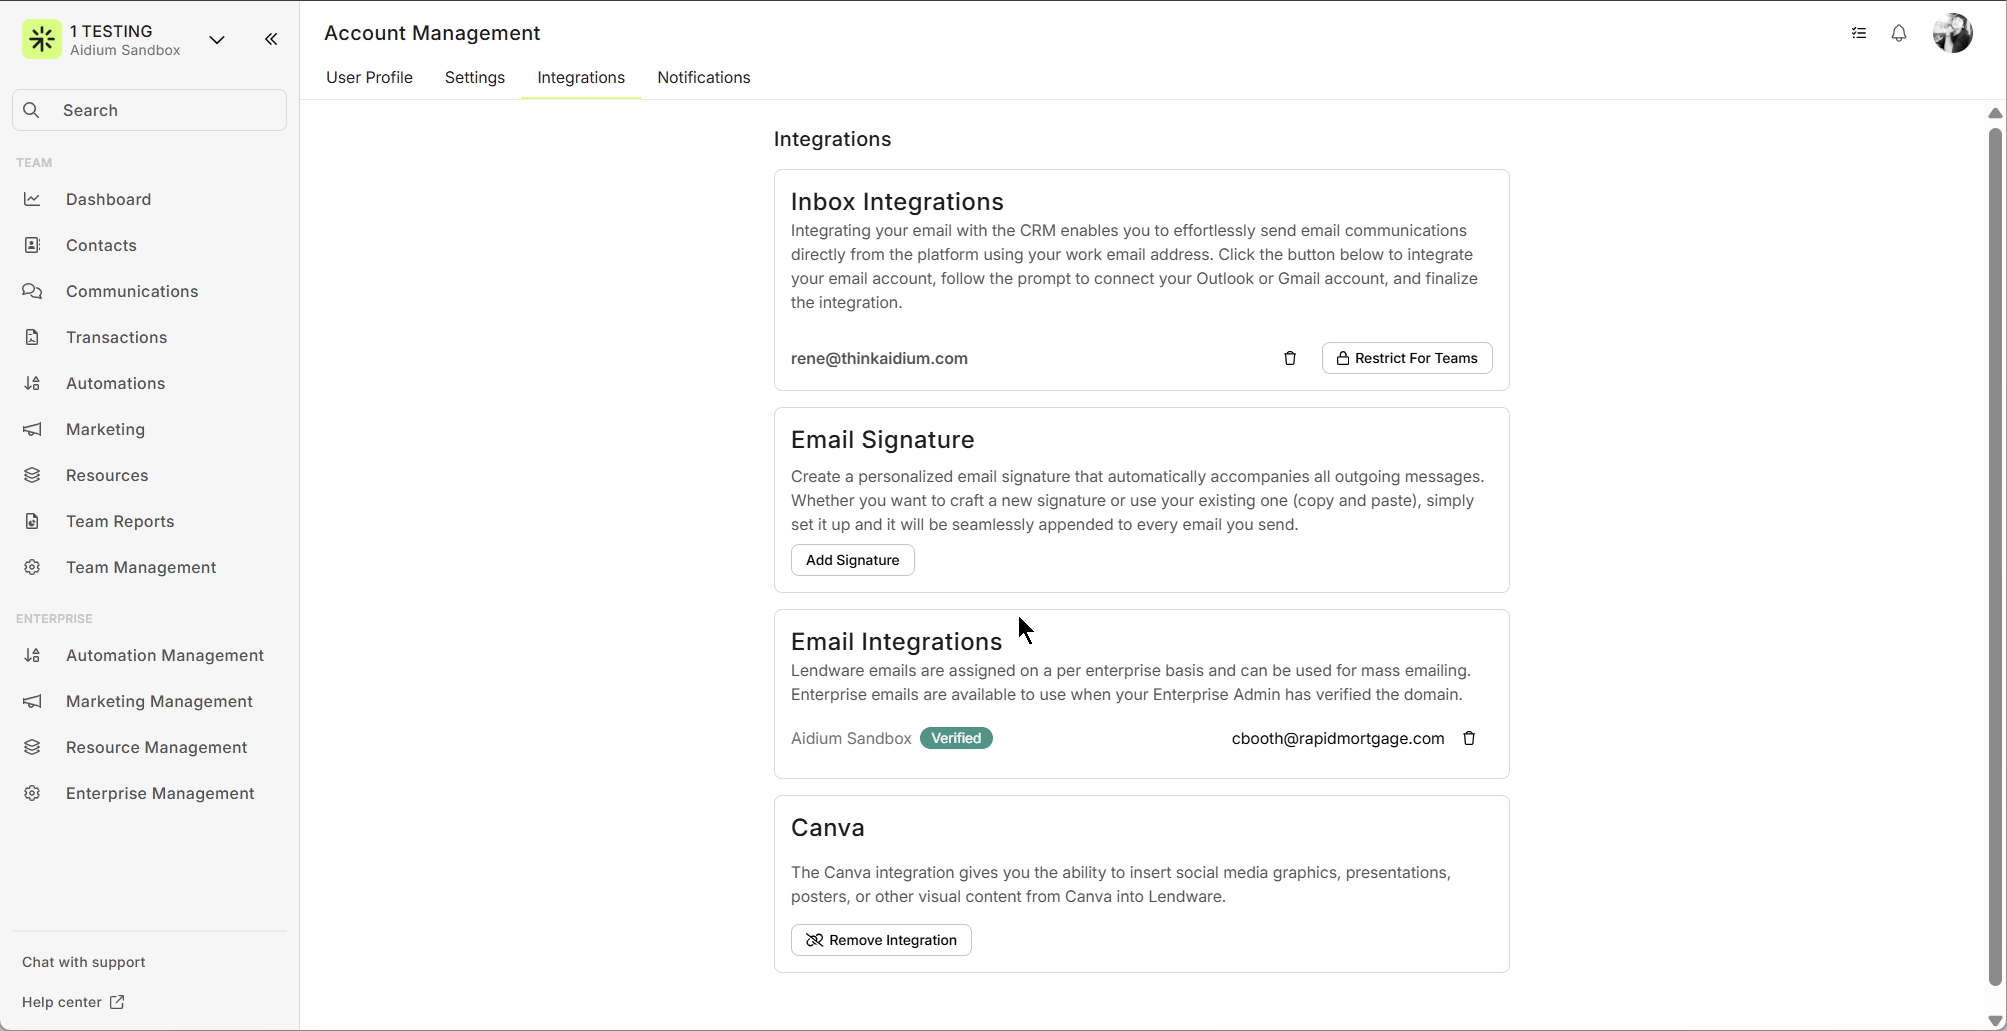
- We are now finished adding our custom HTML email signature. It will automatically be added whenever the email signature merge field is present in an email (which is always added when by default when creating a new email).
Learn how to send a test email to preview the final email signature, click here.
Important: If your email signature has already been set using HTML, do not attempt to view or open it in Text mode, as this could break the formatting. If you need help creating or updating your HTML signature, Support is happy to assist you.
Create a basic signature from scratch using text and merge fields
Adding a text signature is a quick way to get started sending emails. Using the same method in the first section to arrive at the email signature editor, we'll start adding information.
- To begin, while in the Text editor, simply start typing the information you want included within your email signature, like name, title, company, NMLS, phone and website URL.
- Next, we'll add a bit of formatting and make the phone number click-to-dial. When finished, we'll click the 'Save' button at the bottom.

- We are now finished adding our manually created email signature. It will automatically be added whenever the email signature merge field is present in an email (which is always added when by default when creating a new email).
Learn how to send a test email to preview the final email signature, click here.
Find the right web-app to create your own custom HTML signature
There are many great web-apps out there for creating free or low cost custom signatures and exporting in HTML. Below is a list of some of our favorites - this is not a comprehensive list of all that are available. It's important to do your own research, including the option of asking folks you trust what they rely on.
However, since they are built, managed and owned by companies without association with Lendware, we cannot warranty or support their platforms. Use of any outside HTML generators are to be used at your own risk.
- HubSpot - Easy to use and free. Limited in layout and customization. Does require outside hosting of images.
- Gimm.io - Low cost per user. Very customizable and hosts images. Also allows creation of team templates for easily generating new user signatures quickly.
- WiseStamp - Low cost per user. Very customizable and hosts images. Great for call-to-action heavy signatures.
Once you have exported the HTML signature, return to this section for instructions on adding it.
Send a test email to preview your new email signature
Once a signature has been added to User Settings, it's recommended to send a test email to verify the signature looks and acts as intended. Below, we'll demonstrate how to send a quick test email to a contact.
Before we do so, we must Integrate our email with Outlook or Google. All direct emails are sent through a user's email integration.
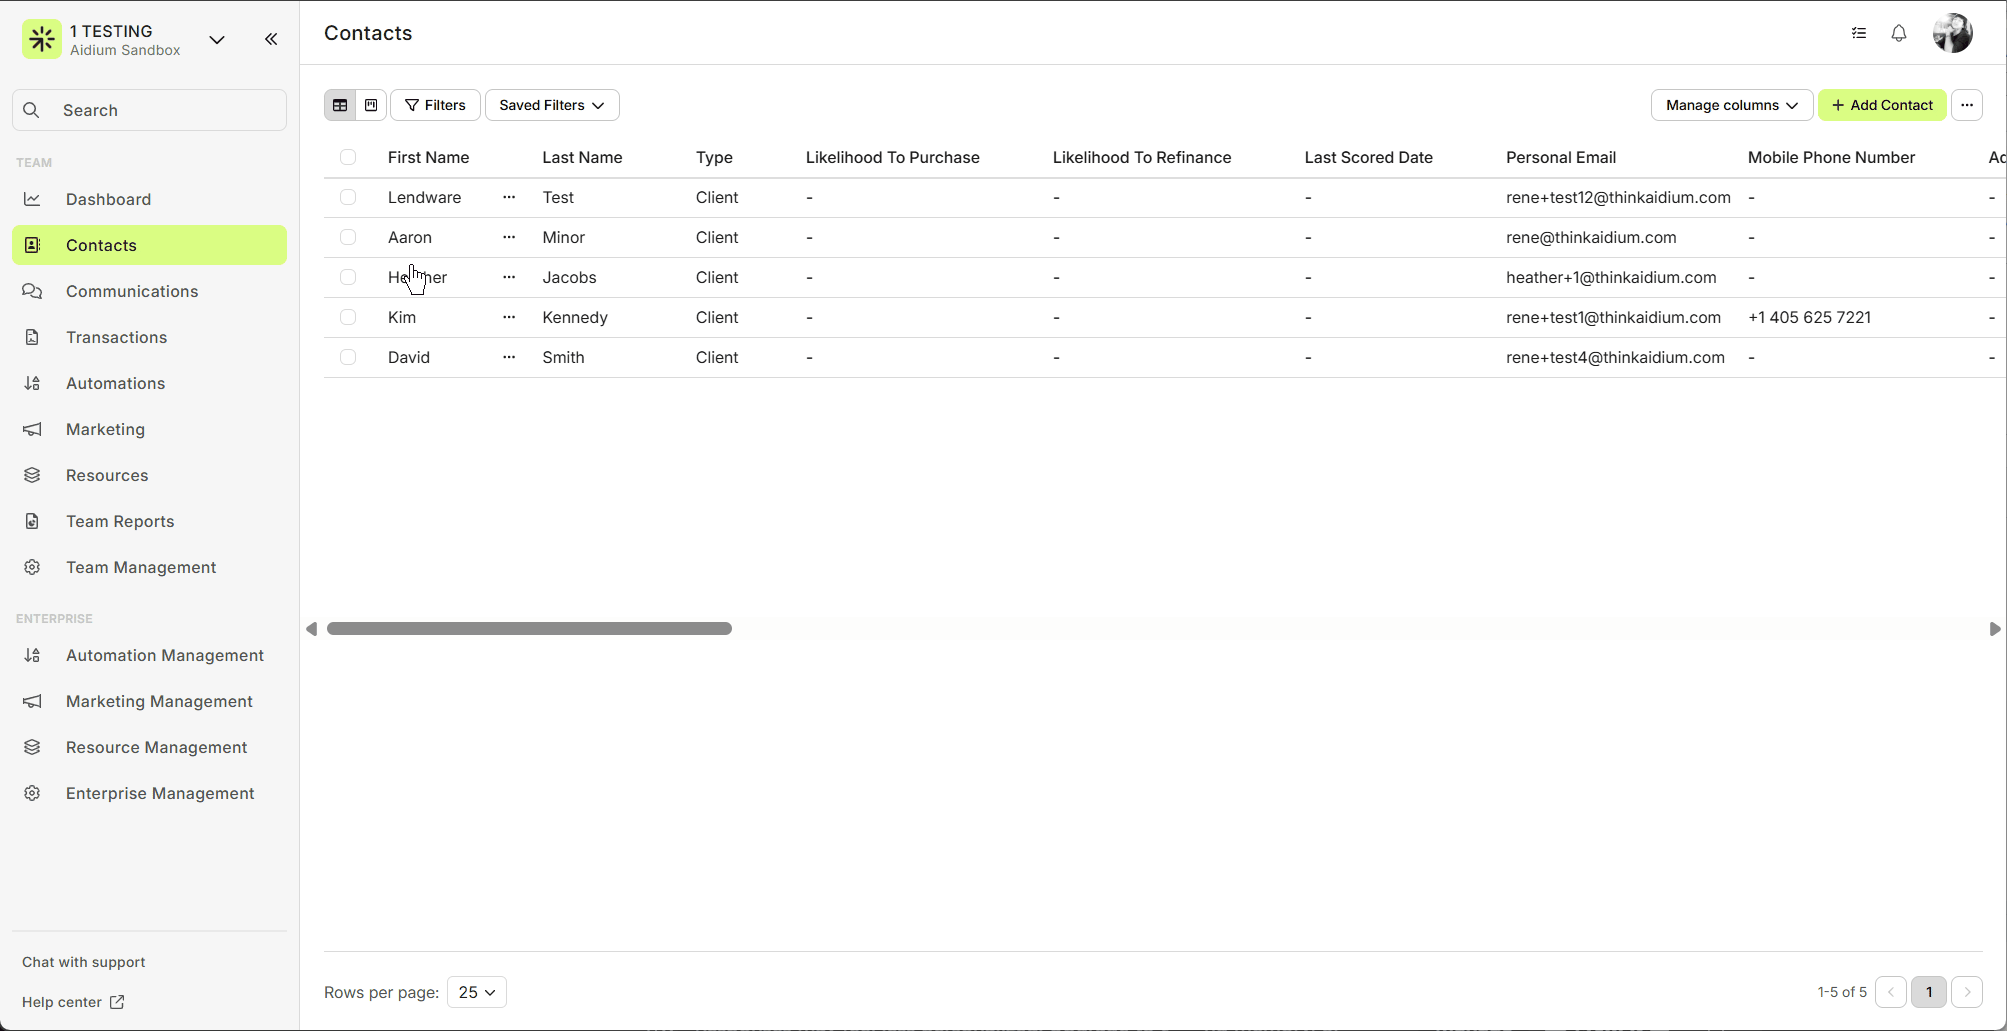
- If we do not yet have a testing contact added in Lendware, we will do that first. We'll first go to the Contacts page and click the 'Add Contact' button. At this point, the Create Contact drawer will slide-out, ready for editing.
- Next, we'll give the contact a name, add out cell phone and personal email address. This is a great contact to always have available for testing and verifying just about anything. From Marketing automations, emails, SMS and much more.
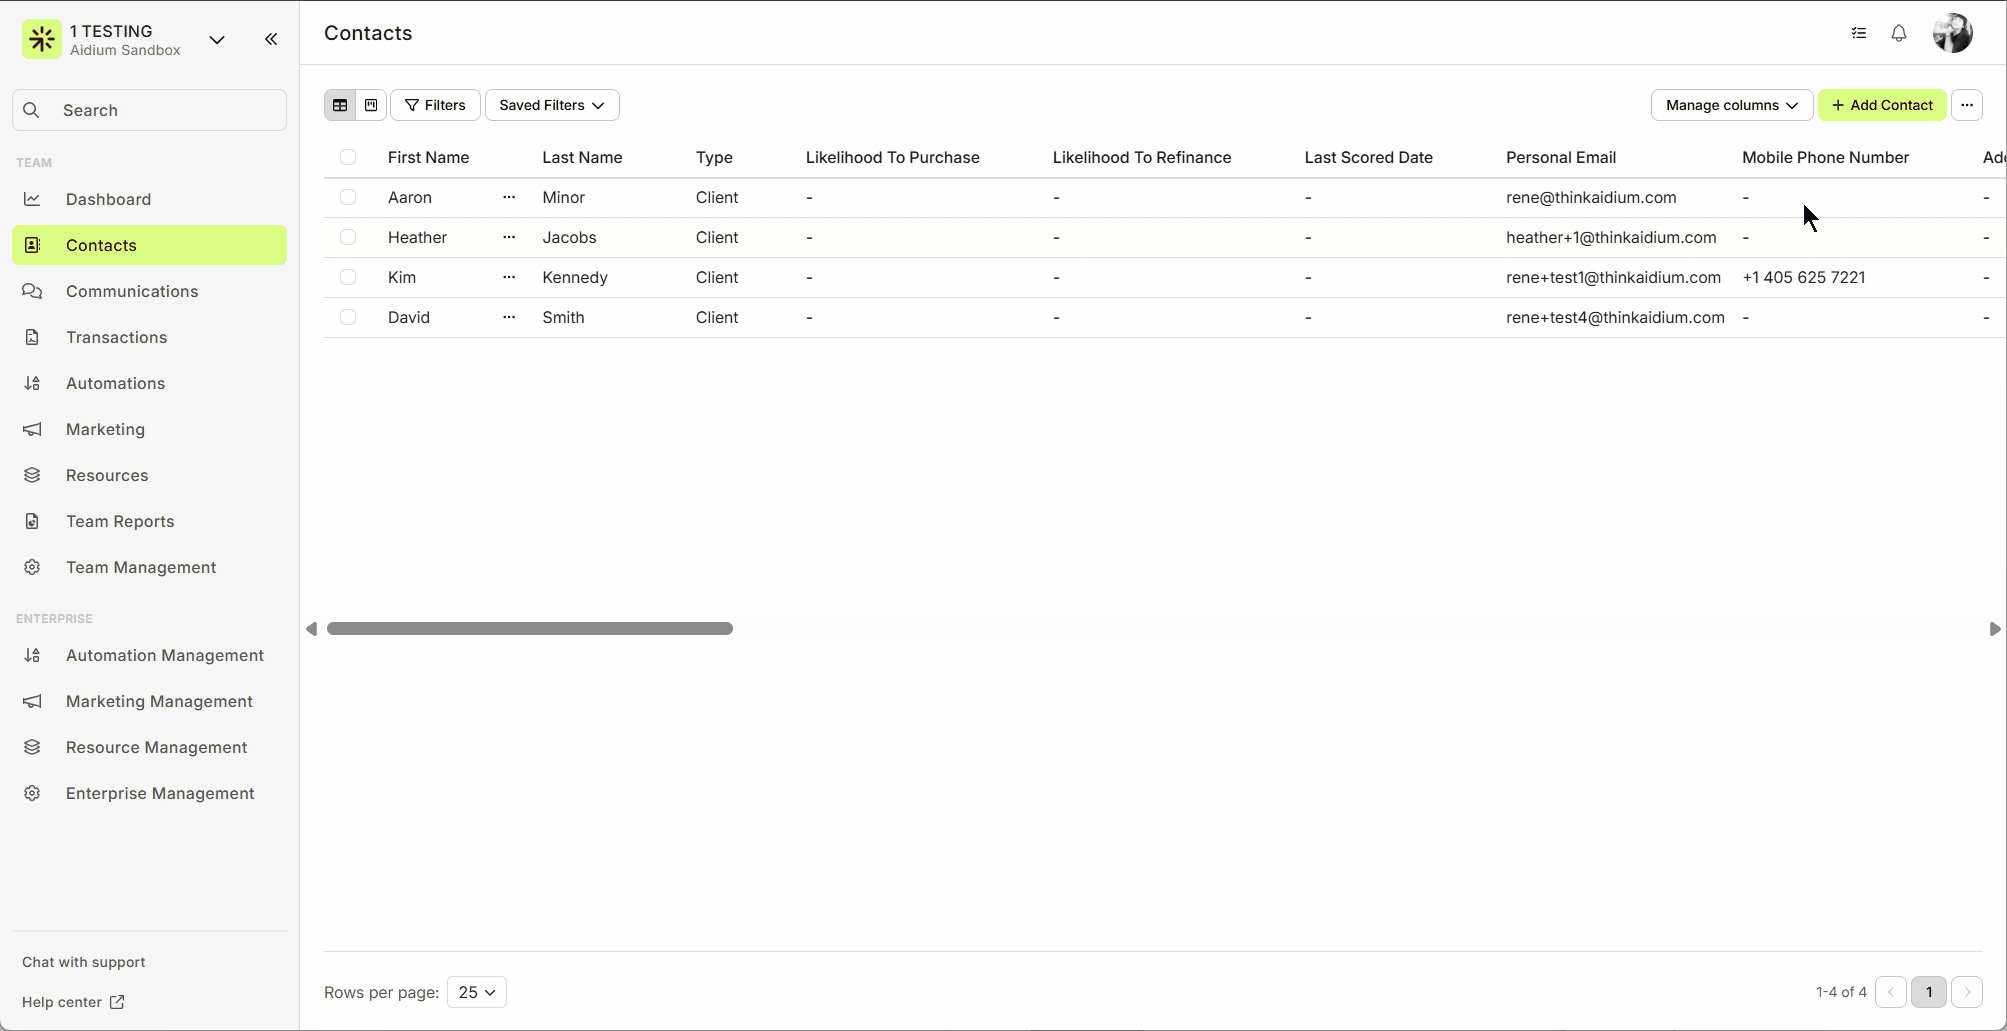
- Now that we have a new contact, we'll send a quick test email. First, we will find the new contact we created. There are a few ways to find that contact.
- Back on the Contacts page, click the new contact name - this will open the Contact Detail.
- In the Search bar, under the Team Name, click and enter some or all of the new name. When we see the contact listed, we'll click on it to open the Contact Detail.
- Now that we're in the Contact Detail of our new test contact, we'll simply click the email button - add a subject and then send it. Since the email signature merge field is always auto-populated when creating a new email, this is all we will have to do to test our new email signature.
- Now, all we have to do is check our email to verify the signature. Additionally, we can also check the Communication History within our test Contact Detail, by clicking the 'View' link on the preview.
👍 This concludes sending a test email to verify your signature