User Custom Fields
User Custom Fields provide a simple way to store personalized information for each user across your enterprise. These fields can be used as merge tags in outbound emails and SMS messages—helping you deliver relevant, accurate, and customized communication at scale.
Before creating User Custom Fields, it’s important to understand how Enterprise Management works.. To learn more, click here.
Enterprise Management is the central area where Admin users manage settings and configurations across the organization. It allows for enterprise-wide customization, ensuring consistent structure and automation throughout your company. This section includes areas such as profile management, compliance settings, integrations, and custom fields for contacts, transactions, and users. It streamlines how your enterprise operates and helps keep everything running smoothly.
Types of Data Fields
When creating User Custom Fields, you can choose from the following data types:
-
Text – Open text, from a single word to a full sentence.
-
Number – Limited to numeric values only.
-
Date – Month, Day, Year.
In this article, we will demonstrate the following:
- Access Enterprise Management
- Add a User Custom Field
- Edit a User Custom Field Name
- Delete a User Custom Field
- Update User Profile
- Custom User Merge Fields
Accessing Enterprise Management
To access the Enterprise Management section:
-
Log into your Enterprise account as an Admin.
-
In the left-hand menu (near the bottom), click on Enterprise Management.

- From the sidebar, select User Custom Fields.

👍 This concludes accessing Enterprise Management to add a new user custom field
Adding a New User Custom Field
Creating a new custom field takes less than a minute and will immediately be available to all users across your enterprise.
-
Click the + Add Custom Field button.

-
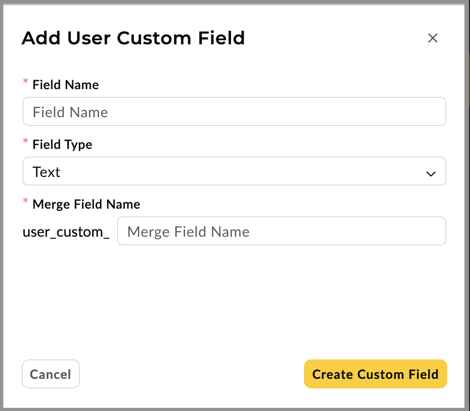
The Add User Custom Field slide-out will appear. Enter the following information for the new field:
-
Field Name – This is the display name for the field. It should be clear so users understand what information is needed.
-
Field Type – Choose from Text, Number, or Date.
-
Merge Field Name – This is the merge tag used for emails and SMS/texts. Keep it short for easier use.

🚧 If no custom fields have been created yet, there will be two buttons. If there are existing custom fields, the + Add Custom Field button will be located at the upper-right.
🚧 Once a custom field is created, the Field Type and Merge Field Name cannot be edited to maintain data integrity.
In the animated GIF below, we'll demonstrate creating a new user custom field.
This process can be repeated to add as many user custom fields as required.
👍 This concludes adding a new user custom field
Editing a User Custom Field Name
If you need to update a custom field name (e.g., changing "Year Stated" to "Year Started in Industry"), follow these steps:
-
In Enterprise Management, locate the field you want to edit.
-
Click the Edit button next to the field.
-
Change the field name to better describe the data it holds.

💡 Updating the name helps users easily identify what information is needed for the custom field.
👍 This concludes editing a user custom field
Deleting a User Custom Field
To delete a custom field that is no longer needed:
-
In the User Custom Fields section, find the field you want to delete.
-
Click the Delete button.
-
Confirm the deletion.
In the animated GIF below, we'll demonstrate how to quickly delete an unneeded or newly created custom field that has an error.
Deleting a field will immediately remove it from the entire enterprise, so make sure it’s no longer required before deleting.
👍 This concludes deleting a user custom field
Update a User Profile
Once you've added new custom fields, users can update their profiles with the new information.
- Click on your Name in the upper-right corner of the screen, then select Account Settings.

- You will be directed to the Account Settings page, where you can manage your profile and other settings.

- Fill in the appropriate information for each custom field.

In the animated GIF below, we'll demonstrate adding our own information into each new user custom field.

👍 This concludes editing a user custom field from the user profile page
Using Custom Merge Fields in Emails and SMS
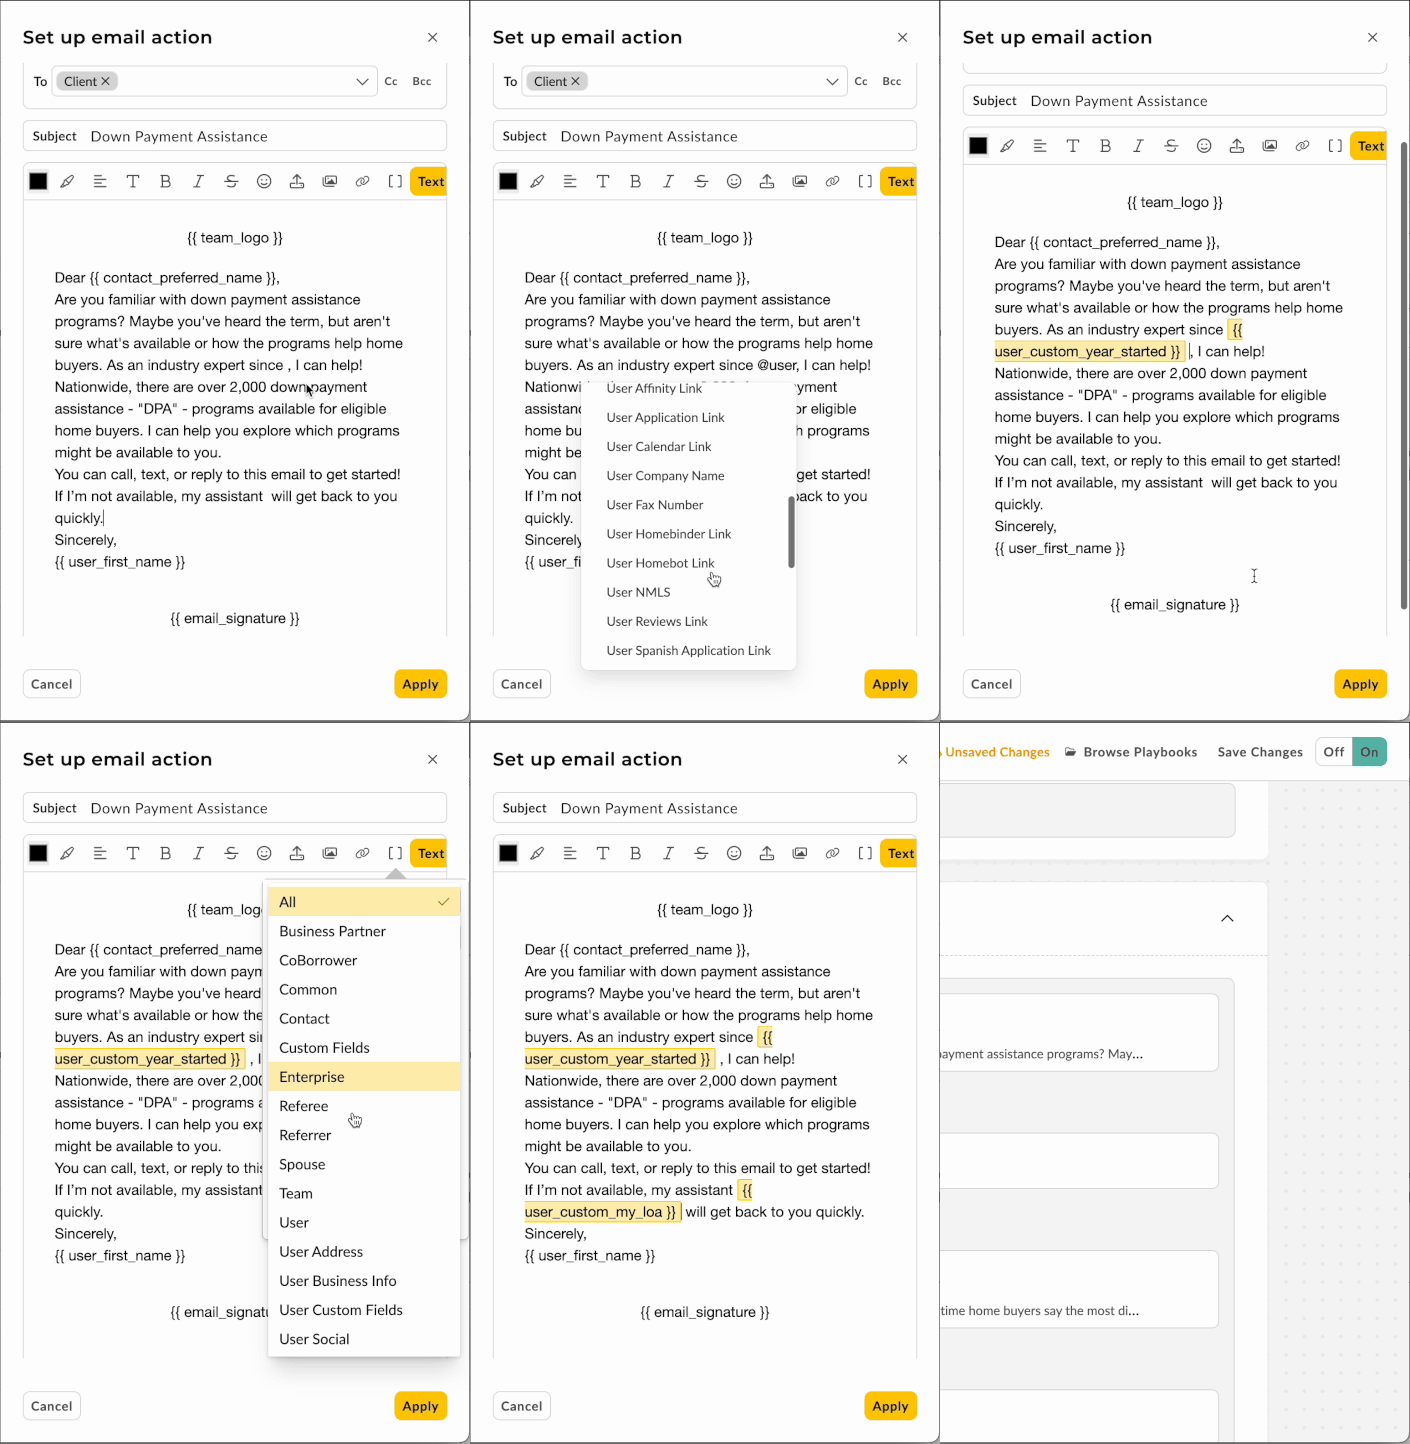
User custom fields can be used as merge fields in outbound emails or SMS/text messages. This allows you to automatically insert personalized information from custom fields into your communications.
-
While creating or editing an email/SMS, click on Insert Merge Field.
-
Select the appropriate custom field.
-
The merge tag will automatically populate in the message, allowing you to personalize it for each recipient.
In the animated GIF below, we'll demonstrate how to add multiple custom user fields in an email.
