- Get to know Transactions Table View
- Get to know Transactions Pipeline View
- Anatomy of a Transaction
- Add a Transaction Manually
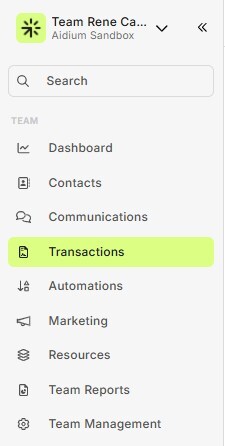
To start, click on 'Transactions' in the left-side menu
Transactions - Table View
The Table View is your default view for Transactions. This will provide a list of all loans, along with the ability to quickly add Filters to limit the transaction shown as well as add/remove columns to display only and all of the data you prefer.
Additionally, you can easily export your 'filtered' list of loans for easy sharing with your team or business partners.
- When Transactions first loads, it will look like this. It is the 'Table View'

- By default, most of the available fields are included - you can scroll right-to-left to see more data. You can also manage the columns - add/remove - by clicking the 'Manage columns' button, on far right, next to the 'Pipeline View' toggle.
Below is an animated GIF that will show how to scroll - and update the visible columns.
- Filtering the Transactional data is incredibly powerful to show you only the transactions you wish to find. There are too many potential filters to review in this section - however, we will review some common uses.
Before you click on the 'Filters' button, note the number: 0 = no filters applied - If the number is 1 or more, that means filter(s) are already applied to your transaction table view. In our case, there are no filters yet applied and we will go ahead and click the 'Filters' button. - Next, you should see the Filters drawer slide-out at the right of the screen. If empty, click on the '+ Add Filter Criteria' button.
- Our first basic filter will be to narrow down the transactions to within the state of Missouri.
We will simply add the filter criteria: Property State = NC
After we clicked the 'Apply' button a the bottom, in yellow - We are now presented with all Transactions where State = NC - North Carolina - At any time, you can change how many transactions show in the Table View (25, 50, 100 transactions per page) - as well as go to the next page of transactions. The number of available pages is directly correlates to the filter(s) you may have applied, the number of transactions per page and of course, the overall amount of transaction and your shared visibility.
Below is taken from the bottom of the Transactions Table View.
👍 This concludes an overview of the transactions table view.
Transactions - Pipeline View
The pipeline view is a great way to see your loans organized by their current Milestone -or- Status. Not only do you get to see your pipeline in an organized and process forward view, but you can also view important details at a glance, open each transaction - and - you can even manually advance a loan to the next Status quickly and easily.
First, we will dive into what the Pipeline view looks like, then how to open and finally, how to advance.
- Immediately, you will see organized transaction based on their respective Statuses. By scrolling from left to right, you will be able to see all available statuses and in the logical order set forth by your administrator. This animated GIF shows how easy it is to set the Pipeline view and to scroll through your transactions.
- Just as in the previous section, you can Filter your available loans to show only what you're looking for. **Go here to view that section**
- From within each Status group, you can click on the '. . .' at the top-right to choose from more options to adjust the order in which transactions are displayed.
While, 'Add a new transaction to this status' is an available option - we will explain that later in this article.
- The last big item in this section is manually moving a Transaction from one Status to another with a click-and-drag. The animated GIF below should provide all the details you need to understand its function.
Simply click and drag the Loan from one Status to the next appropriate. It will ask you to confirm, to avoid any mistakes. If you do confirm the move, there is a high likelihood that the change in Status would trigger communications to Borrower(s) and Agents associated with the loan. Use caution, especially when your LOS is connected and you normally rely on the LOS to drive your Transaction automatons.
👍 This concludes an overview of the transaction pipeline view and it's various functions.
Anatomy of a Transaction
Transactions contain all the important loan details and related contacts that are either passed from your LOS, **Zapier** or added manually by you or a team member. These details are easily viewed, interacted with or changed, while in the Transactions section of your system.
- First, you must open a transaction - to do so, no matter the transaction view you're in, just click on the BLUE text. Two images below reference what you should be looking for to open.

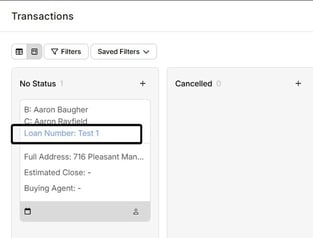
- Opening a transaction will slide-out the Transaction Details drawer on the far-right. In order to save space and reduce clutter - only initial details from each section are visible. However, you can easily expand each section to find, update or add information to the transaction.
The animated GIF below should demonstrate the ease in which you can navigate and edit a transaction.
⚠️ When editing a transaction that was created by your LOS - please be aware that the LOS will likely continue to update the transaction. Therefore, if data conflicts - the LOS will be considered the correct party, rather than edits made within the system.
👍 This concludes the anatomy and editing of a transaction
Manually Add a Transaction
At any time, you can add a transaction - this can be helpful when you have a loan that in a system that does not push data to your account. A good example would be if you are brokering a loan through a wholesaler that does not push data to your system. There are two main benefits:
- Your own tracking of a loan to maintain your standard process and visibility to you and your team
- Loan Updates - You can take advantage of your already existing Loan In-Process (IPW) updates based on the Transaction Statuses. Simply manually advance your loan, which will trigger IPW updates to go out, just as you would expect when your LOS provides an update automatically.
To manually add a transaction - simply start in the transaction view of your choice.
- Find and click the '+ Add Transaction' button, in yellow.
- A slide-out the Transaction Details will appear on the far-right. This will allow you to add any of the details you would like to start with. In order to save space and reduce the changes of overwhelming the user - only initial details from each section are visible. However, you can easily expand each section to find, update or add information to the transaction.
In the animated GIF below, we will add basic details to a transaction. It's important to remember to add the Borrower to any transaction you manually create.
- When complete - Click 'Save' at the bottom, in yellow.
If you did not set a Transaction Status, it will show in the Pipeline view in the 'No Status' section.
From here, you can manually update the Transaction Status when appropriate to trigger In-Process Workflow (IPW) communications to Borrowers and the Loan Related Contacts associated with the Loan.
👍 This concludes manually creating a transaction and adding information